Do Vape Mods Affect the Quality of Vape?

Published on: 09 August 2019 Last Updated on: 23 June 2021
Vape Mods

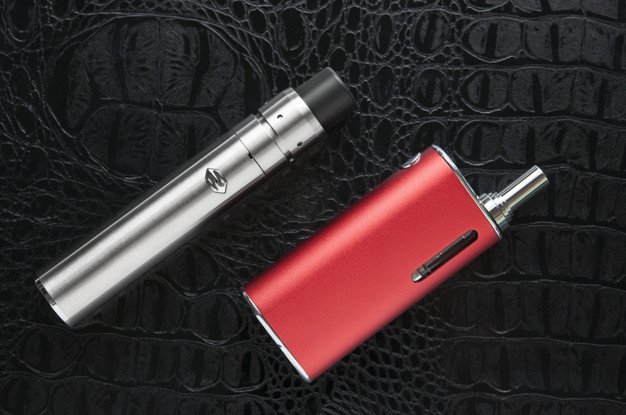
Vape Mods usually are larger than e-cigarettes with a higher vapor density and production. It is called as such because the device is similar to a typical vape pen, but has an enhanced form and advanced features. Such “modification” come in many types including better battery size, more e-liquid capacity, or a powerful mechanism to sustain good heating and quality vapor release.  Whatever the type of vape mod used, it always has an effect on the overall capacity of the vape.

Vape Mod Configuration Have Different Effects on Vapor Taste and Quality:

Opting to use a vape mod depends on a lot of things including several years a person has been vaping and the kind of experience they want to have. Though consequentially, it all boils down to personal preferences, and the amount of satisfaction one acquires from the habit. In a traditional sense, people who have been vaping for a long time would want to experiment with something new and venture into other devices.

For one, temperature control is affected by the vape mod, which also impacts cloud formation and the level of flavor one acquires from every puff. The sweetness, depth of the essence, and the distinct taste are all affected by the mod and wattage of the device.

For example, using a Creamie Blue Raspberry Milk using a Crown tank with a 0.5-ohm coil and at 60w will have the usual vapor taste. But using a different mod with a different setting will change the flavor to a distinct sweetness and less depth. The same goes when using a different vape mod with varying capacities and configurations.

The Atomizer and Coil Wick Combination Produce Larger Effects:

For people who had years of experience using Vape mods UK, they know that the combination of the atomizer, coil, and the wick produces a more significant effect on the vaping experience. Though the mod is a crucial element of the device, experimenting with it does more than giving a person the idea of which one fits his preferences.

People just getting into the habit can quickly move to a Rebuildable Tank Atomizer (RTA) then shift his vaping to a Rebuildable Drip Atomizer (RDA) for the best flavor. There is also a broad spectrum of tanks to choose from and the ability to fully customize a vaping device according to an individual’s liking.

Many would also say that quality vaping experience does not come with pre-built atomizers or factory coils, but the ones that are personally customized. This is mainly because quality control is the sole responsibility of the vaper and not from the manufacturer.

Customizing a vape also allows a person to tailor his device based on his preferences entirely. This often includes picking his own vape mods the UK, the type of wicks, and wires connecting the base to the battery. While all the components including the tank, coils, and mod have a considerable effect on the flavor and smoke quality, it can be customized based on the user and not just the pre-set configuration of the manufacturer.

Read Also:

Content Rally wrapped around an online publication where you can publish your own intellectuals. It is a publishing platform designed to make great stories by content creators. This is your era, your place to be online. So come forward share your views, thoughts and ideas via Content Rally.

View all posts

Leave a Reply

Your email address will not be published. Required fields are marked *

Related

Alexa device issue

How To Troubleshoot The Alexa Not Responding Issue? [Fixed]

Alexa is a virtual assistant, which works with an echo dot in order to fulfill all the demands of its users. With its thousands of attractive features, Alexa has made the life of its users super easy and also entertaining at the same time.  With its hi-tech features, Alexa can do almost everything from controlling smart home lights to set reminders, playing songs, jokes, news, quizzes, and much more things. But due to some reasons, you may find your Alexa not responding to the commands that you are giving it.  Do not worry if you are facing the Alexa not responding issue. Here we have the most effective and easiest troubleshooting steps to fix this issue.  Troubleshoot The Alexa Not Responding Issue: Here are the troubleshooting steps that you need to follow for solving the Alexa not responding issue with your echo dot. There are a bunch of reasons for what you may be facing this Alexa not working issue.  So, let’s head towards the troubleshooting steps.  1. Check The Microphone Button There are many instances when we find that the reason behind Alexa not responding is because the microphone is damaged or we forget to turn the button on. The microphone button is one of the most common reasons for this issue.  So, check the microphone button first. If the issue persists and it seems that everything is totally fine there. You can step to the next process.  2. Reboot The Device This is one of the most effective and easiest ways in the whole troubleshooting process of Alexa is not responding issue. There is not much trouble, all you need to do is just restart the device and the issue will get resolved. But this restarting has a definite name called power drain, and it is more than just powering off the power button and power on it again.  Here is the step-by-step guide for the power drain process. First, you need to check the power light. In case it is showing blue light, that means the device is able to hear you but simply the Alexa device is unresponsive to your commands.  Disconnect the power cable from the power source for at least 30 seconds. Wait for a little while, and after that, connect the power cord again with the power outlet. Now, when your device is ready completely, try to give it any command again. If the issue is resolved, then it is fine. But in case the issue of Alexa not responding continues, head to the next step.  3. Echo Dot Hard Reset In case the above described troubleshoot does not work for your echo dot. Here is the step-by-step guide to hard reset. You will find the reset button at the bottom of the device. You can use a pin to press the button. As soon as you press the button, the device will power off. Here, you need to wait for a little and then power the device on again. All the settings of the device will then reset to the original.  4. Disable And Enable Alexa Privacy If Alexa not responding after all the above-mentioned troubleshooting steps, now is the time to enable Alexa privacy and in order to do so, follow the below steps. You will find a button at the end of Alexa’s nucleus screen. You need to press the button. This button is to enable the privacy of Alexa. If you press the button again, the device will hear you again. Give a command to Alexa in order to check whether the issue is resolved or not.  5. Check Your WiFi Connection Behind the “Alexa not responding” issue, there is a huge chance that maybe your wifi connection is not working properly. That is why Alexa is finding it difficult to respond to your commands.  Well, let me tell you that if you do not have a proper internet connection, there will be no use for this Alexa device. So, check the router now. In case you find anything wrong, contact your network service provider.  6. Try Changing The Position  In case you have placed your echo dot device far from your router or in someplace where it is having issues connecting with the router. This can be the main reason why you are experiencing “Alexa not responding.”  Make sure that you are placing Alexa within the wifi range. The place should be accessible to yours as well so that your echo dot device can connect with the network properly and also can hear you clearly.  7. Set Echo And Smartphone On The Same Network Always keep in mind that the smartphone that you are using and Alexa have to be connected within the same network. In case they are connected with different routers or your phone is not connected with the router’s network, you will face the “Alexa not responding issues.” Connect both of them on the same router’s network in order to resolve the issue.  8. WiFi Congestions If you have connected a lot of devices within the same router’s network, it may create the “Alexa not responding” issue. Due to excessive wifi congestions, your echo dot is not able to respond to your given commands. Remove or disconnect some other devices, and then try to give your device command and check if the issue is resolved.  Still Alexa Not Responding? All the steps that I have told you in this troubleshooting guide are enough for resolving Alexa not responding to voice issue. But if you face the same problem after performing all the troubleshooting steps. You should contact Alexa customer care. Call on the Alexa helpline number and ask for help.  More Resources:  Benefits Of Having A Cordless Vacuum Cleaner At Home What is type c cable, and is it worth buying

READ MOREDetails
aeropress machine

How to Make Coffee with Aeropress Machine

 The Aero press is one of the most straightforward gadgets that you can use to make your morning coffee faster. Invented in 2009 by Engineer Allan Adler, the Aeropress machine has gained popularity due to its small size, high portability and efficient speed in brewing coffee. Due to its portability, you can carry the device to your camping escapade, fishing, or any sporting coffee. With the Aeropress machine, you can have your coffee anywhere at any time. How to assemble an Aeropress machine Remember, you can buy your Aeropress coffee maker from a trustworthy place. Some of the accessories that come with the coffee machine include: The Aeropress device which is a plastic plunger Cap that should get placed at the end of the AeroPress device The fillers which should be used alongside the cap A scoop that should be used to measure the coffee A funnel to put the beans and neatly organize them in the chamber Paddle to be used in stirring the coffee Once you have acquired all the accessories of the AeroPress machine, here is how to assemble the machine: Step 1: Push the plunger of the machine out of the chamber Step2: Remove the filter and put it in the filter cap Step3: By twisting the filter cap, put it into the chamber Step4:  Put the chamber on top of a stand. Put the chamber on a sturdy mug and ensure it stands firmly. Put the ground coffee in the chamber. Step5: Share properly to ensure the coffee is leveled correctly. Step 6:  Add water to the chamber. Ensure the water fill up to level 1. At this point, you are ready to brew the coffee. If you want hot coffee, use hot water, but if you need cold coffee, use cold water. Remember, with the AeroPress machine, the coffee taste is determined purely by the water's temperature. If you use boiling water, it will make your coffee bitter. The manufacturer's recommendation is to use water at 175 degrees. Though it is not practical to achieve the exact temperature, you can boil the water and allow it to cool down before using it. Also, ensure that you use high-quality coffee bean; preferably, coffee beans that have been ground recently. The coffee bean should be finely ground. How to brew coffee If you have everything in place, the process of brewing coffee should take less than two minutes. There are two ways to make coffee using the AeroPress machine; the inverted way, and the usual way. Both methods make delicious coffee, but one is faster. Equipment required Electric stove and kettle The AeroPress machine; stirrer, funnel, and scoop A coffee grinder Small pitcher, or a mug Timer Original method Start by boiling the water. Remember, boil the water and let it cool for a minute since the coffee maker works best at a temperature of 175 degrees. Grind your beans. Depending on the amount of coffee that you want to make, grind the beans accordingly. For the two cups, grind at least two spoonfuls of coffee. Remember, you must grind the coffee until its fine. Ensure the filter is wet. After assembling the Aeropress machine, put paper filler inside the cap. Place the device on top of a mug and dab the filter with warm water. Place the warm funnel on top of a mug and dispense the coffee. After pouring the coffee, remove the funnel. Add warm water. Ensure you add the water until it gets to the marked line in the machine. Remember, the water should be recently boiled and cooled. Using a spoon or a paddle stirrer, stir the coffee until it dissolves. Insert the plunger by pressing it down till a hiss is heard. If you fill any resistance, pause briefly. Push the plunger gently until it reaches the ground. 8. Remove filler cap while pushing the plunger. This should eject the used coffee while rinsing the seal. Dilute and taste your coffee. Depending on how you want your coffee to taste, add more water. The Aeropress machine makes concentrated coffee. Thus you can split the concentrated coffee and make more cups. Reverse method Reverse method is similar to the standard process but with few adjustments. Here is the method: Start by assembling the Aeropress machine. Remember, in this method, and the machine must get assembled in an upside-down manner. Put the plunger in the chamber, flip the device upside-down, and don't put the cap and the filter. Put the funnel and pour the ground coffee. Use fine coffee grits enough for the amount of coffee needed. Next, add boiled water until you fill the filter. Remember, you should boil the water and let it cool for a few minutes. using a spoon or a paddle, stir the coffee gently. Steep the coffee for at least one minute. Place the paper cap and tightly screw it into the chamber Carefully, flip over the machine. Remember, this should get done accurately and quickly. After flipping, place the device on a mug Taste the coffee and dilute as desired. Remember, both ways make concentrated coffee, thus add water until you get the desired coffee. The Aeropress machine features as the most resourceful and most efficient coffee maker. It is less fussy and makes minimum noise; hence, you can use in places that require minimum noise. The machine is also highly affordable, with some brand costing less than twenty dollars on amazon. It is light and highly durable; thus, it can last long and give you value for money. It is easy to assemble and clean, even if you don't have any technical knowledge. The only downside of this machine is that you can only make two cups of coffee. Thus, if you are hosting a party, or your household has more than two people, then you will be forced to make the coffee several times. How to make coffee: [embed]https://www.youtube.com/watch?v=jlCUYNe9pes&t=100s[/embed] Read Also: 10 Best Coffee Places In The US How You Can Create A Coffee House Experience In Your Own Home 7 Fantastically Unusual Uses Of Old Coffee Beans Monthly Best Coffee Subscription

READ MOREDetails
Gun Bluing

Does Vinegar Harm Gun Bluing?

Gun safety and maintenance are at the forefront of most gun owners’ minds.  We want to be able to clean our firearms without worrying about damaging them.  If you’ve looked at online forums at any point, you may have seen some people recommending using vinegar in cleaning. Is this safe, though?  Well, I’ll explain to you why it’s probably not the best thing to use in this article.  There are better alternatives that can clean it without any risk of corroding the metal – especially something like aluminum. Cleaning our Weapons As I mentioned above, if you look at any forums like this one, there is a hot debate on how to properly clean our weapons.  A variety of methods are suggested.  It’s important to remember that bluing on our guns is a vital part of it. You see, it protects the metal beneath from oxidation, usually known as rust.  Besides being ugly, it can negatively impact its integrity of it.  If there is already rust, though, you might need to scrape it away.  This can remove some of the bluings. How can you clean them, then?  Some recommend vinegar or a combination of that and other materials such as peroxide.  Unfortunately, this can damage it.  Acids and other corrosives probably are not a good idea. What Should We Use Instead? There are a few ways that we can go about this.  You are probably wondering what the best rust remover for guns is, so I’ll discuss a few options here.  The first thing I will cover is prevention. If you store your firearm in a cool and dry place, it will most likely not oxidize at all.  This is a good way to keep this problem from happening in the first place.  However, if rust does occur, you can go on to the next methods. You could try a battery charger.  For this, though, you will need a few other things.  This will probably only work for one made of something like aluminum or copper, as well.   Locate some baking soda, a battery charger, a steel rod, and a plastic container. No matter which way you are cleaning, make sure the gun is not loaded.  This is for your own safety as well as everyone else around you.  You should look in the barrel and double-check, maybe even triple-check, that there is no ammunition within. Next, you might try a traditional cleaning kit.  You can get them at most retailers that sell weapons like this.  This might be a slightly pricey option, but because the products are designed for this purpose, they are safe.  There is a low chance of damaging the bluing. Of course, you could also use steel wool and some oil.  If you use a form of lubricating oil before going in with the abrasive surface of the steel wool, you will most likely be able to remove the rust without causing any damage.  You need to have a careful and methodical process. As you go about the process of your choice, you will want to keep in mind some essential parts of cleaning your gun.  As you disassemble it, you should only do it in the way that the creator of it tells you to.  Otherwise, you may be risking your own safety. Wherever you decide to do it, it should not be a closed space.  Having proper ventilation is critical so that you do not inhale anything toxic.  Some firearms use lead in them or ammunition.  Breathing this in is not something you will want to do. If you didn’t know, it is recommended to care for your weapon after each time you use it.  Whether you go hunting or to the shooting range, getting rid of the residue is a part of being a responsible owner.  What you use for this might vary depending on the type you own. For example, rifle users may want to get a barrel snake.  This probably is not necessary for pistols or other smaller barreled guns, though.  My recommendation is to do your research on what to use for your specific weapon, and you probably should not use vinegar. Additionals: What is an Airsoft Gun? How Gun and Security Gear Advanced through the Years Parts of a Gun: All You Need to Know About the Components of Your Firearm

READ MOREDetails