Published on: 12 April 2021
Last Updated on: 27 December 2024
Freshly painted doors can enhance the makeover of any house. You can paint your doors on your own or hire a professional painter to do it for you.
Many people prefer painting their doors themselves as they want to enjoy painting them on their own. However, if you don’t have any experience or want high-quality paintwork, you should always hire professionals for complete painting service.
If you choose to paint or spraypaintyourinteriordoors, you need to know some tips and skills to do the job right. Let us explore some tips by professional painters that you can use to paint your doors.
Remove or cover the door handles:
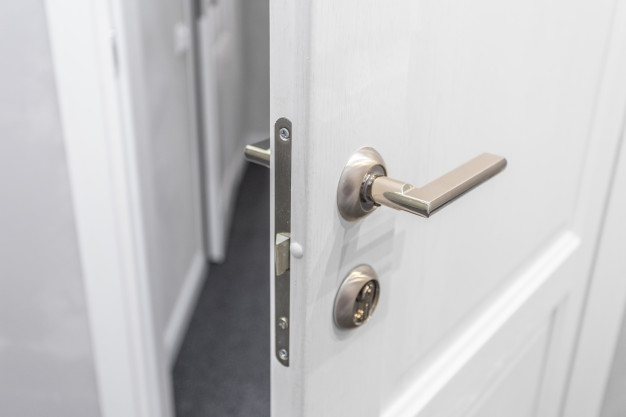
Paint can stain the door handles and locks. So, it is better to remove them or cover them with painter’s tape to prevent them from getting stained. You will need a screwdriver with multiple heads to remove the handles and locks.
Call a locksmith to remove the inbuilt lock systems as they are difficult to remove. Removing these things will make it easy to clean, sand and then paint the doors.
Fill the cracks and holes:
If there are any holes or cracks in your doors, you can fill them with a wood filler, gypsum plaster, or a filling compound. Put a small amount of wood filler or filling compound on a putty knife and put it into the hole or crack uniformly. Place it as uniformly as possible and leave it to dry for at least two hours.
Check the filling the next day, and it requires more filling, add the required amount of filling compound to fill the space completely.
Sand the surfaces:
The old paint gets worn and imperfections develop with time on the door surfaces. That is the reason why homeowners want to repaint their doors. Sanding removes the worn paint and imperfections easily and prepares the surfaces for a clean and uniform finish.
Start painting with a Roller:
If you have already chosen the paint color, mix several cans in a bucket so that you can have the same shade on every door. Sometimes, the shade in different cars can vary a little, although not noticeable in the interiors in low light.
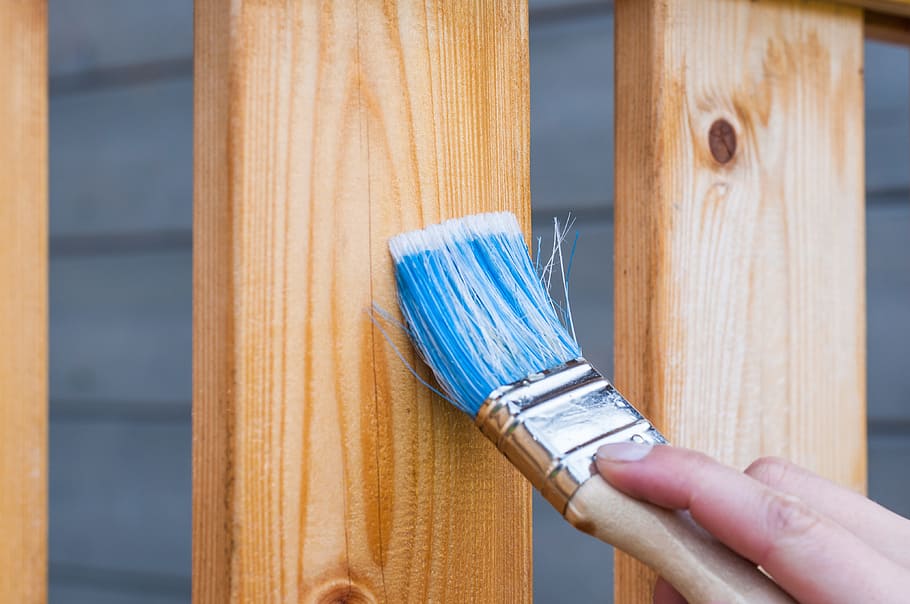
Use a 4-inch roller to apply a thin layer of paint on the door starting from an edge. If you want to paint the trim first, you can use a 2-inch brush.
To remove any lines, move the lightly loaded brush or roller from bottom to top. Using this technique will help you paint quickly and uniformly while leaving a wet edge.
Painting a paneled door:
Many homes have paneled doors and the technique to paint them is different from painting a flat door. Paint every panel beginning from the upper left side downwards in a sequence.
Always use a brush of appropriate width to paint a paneled door. Don’t worry if you paint a bit outside the edges of a panel. Once the edges are painted, use a small roller to paint the space between the panels.
If the rollers of appropriate size are not available, use a 2-to-4-inch brush to paint the center of the panels.
Minimize the drying time:
Paint in light and uniform coats to minimize the drying time. Thick coats of paint take a bit longer to dry and may look nonuniform after drying.
If you are using a brush, you should dip its bristles halfway in the paint and tap the brush against the container edge slightly to remove the excess paint.
If you plan to use a roller, place it in a pan and use the back-and-forth strokes to paint uniformly without soaking it.
Let the paint dry before installing knobs and locks:
Let the paint dry completely before installing the doorknobs and locks. Also, tell your kids and family members not to touch the doors until they dry completely.
Once they dry up completely, you can install the accessories and start using the doors as you use them normally.
Final Words:
Painting the doors is not difficult, even if you are painting them for the first time. All you need to do is to follow the correct sequence of steps, use the right size of tools and prepare the surfaces before grabbing a brush or roller. Following these tips can help you to paint your interior doors easily and conveniently.
Content Rally wrapped around an online publication where you can publish your own intellectuals. It is a publishing platform designed to make great stories by content creators. This is your era, your place to be online. So come forward share your views, thoughts and ideas via Content Rally.
LED Strip Lights provide a lot of benefits over the more traditional luminaries, like halogen, incandescent, and fluorescent. A few of such lights are intrinsic to the LED-technology in general, as the extended life expectancy, while the others are unique to the LED Strips, like flexibility. This post will outline a few of the benefits provided by these new generation strip lights available at https://www.lepro.com/.
Color:
The LED lights are capable of recreating a much broader range of colors than the customary types of lighting, making them particularly suitable for the effects of light installations. As well as the standard cool white and warm white, which are utilized for ambiance, the LED lights can also make a broad spectrum of the customary colors.
Less Electricity:
Like all the LED-technology, these LED Strip lightings make use of considerably less electricity in operation. The typical meter strip of the LED lights will make use of approximately 7.2 watts in power, which can really work out to about ninety percent more efficient than the other lighting types. It can really make these lights incredibly reasonably priced to run and permits the users to experiment with the much larger installations without the fright of running up excessive electricity bills.
Flexible:
The customary luminaries really tend to be housed inside the glass enclosures, which are inflexible and fragile. On the contrary, the LED lights on the strip lights are mounted to the flexible ribbon of the circuit board, which can really be bent around ninety-degree corners and be created to really fit the surfaces with the changing gradient.
Life Expectancy:
The LED lights have a life expectancy that can far exceed that of the customary luminaries. A typical Strip Light will last you up to seventy thousand hours.
Less Heat:
Incandescent and halogen light bulbs are infamous for becoming extremely hot during utilization. The LED Strips (https://www.lepro.com/led-strip-lights) while conversely generate comparatively less heat, making them much safer to make use of and less of a fire hazard.
Discrete:
Such lights are usually contemplated as a linear lighting source because of their extremely long and thin design. It really permits them to be fitted in the locations that the majority of other types of lighting cannot. Under the alcoves, kitchen cabinets, bookcases, shelves, you name it, these LED strip lights can really do it!
Cutting:
The LED Strip Lights are one of those types of lighting available that can easily be cut. They feature cutting points all along the length, which can be utilized for shortening or separating strips. The non-solder connections can be utilized for simple re-connection, or you can also ask the retailer to do the job for you.
Simple Installation:
The mounting strip lights are astonishingly simple and need extremely little know-how. The majority of strips have a three M of self-adhesive backing, which permits them to be stuck down onto the surface without the requirement for brackets or mounts. Even if they do not have such backing, installing them is still quite simple and far less annoying than the installation of the fluorescent tube, for instance.
Diverse manufacturers can provide even more variables and also the custom options in these lightings, so discuss the needs with the signage or LED lighting specialist for deciding exactly which product will really suit the best.
Read Also:
The Benefits of Solar Lighting in a Nutshell
A Rundown of the Basic Led Lighting
Today, the technology has so evolved that we are now talking about mini splits. If you do not know what mini splits are, then you are in luck as we will be discussing this innovation in this article. Our focus shall be on the pros and cons of using it. For those who may wish to know more about the history of ACs, you can read this article.
What Are Mini Splits?
Mini-splits are the ductless evolution of air-conditioners. They are called "splits" because they are designed into two different parts, an indoor unit and an outdoor unit. These two split the traditional cooling process of window units into two.
What the outdoor unit comprises of are condenser coil, compressor and fan and while the indoor unit consists of a fan and an evaporator coil. These two units are linked by electrical wiring and a thin copper tubing to carry the refrigerant.
For the system to work, the compressor located in the outdoor unit pushes the refrigerant through the copper tube to the indoor unit. Here, the cold copper tube exchanges the heat in the indoor space with cooler air which the fan blows into the space. Through this exchange, the refrigerant heats up and changes to a gaseous state and is then cycled back to the outdoor unit where it is cooled back to a liquid form. This cooling process takes place as the coil in the outdoor unit removes the heat absorbed from the indoor unit. Having been cooled, the compressor pushes it back inside and the cycle repeats over and over again.
The Pros And Cons Of Mini-Splits
Having described how these ACs work, we want to look at some pros and cons associated with their use. Like most things in life, regardless of how good they may be, it’s almost impossible not to have a few cons.
Let’s start by looking at some of the Pros
Pros
There are obviously a lot of positives to using mini-splits for cooling your space. Some of the more common ones include the following:
Ease Of Installation
The design of this system makes its installation pretty easy. All you need is a small hole through which to pass the wiring and refrigerant tube. You then need to mount the indoor unit where you need it to be and do same with the outdoor unit. This is something that air conditioning services can send a single technician to install with ease, unlike the central cooling type that will require a lot of work and ducts.
Quiet Operation
Another benefit that you can enjoy with these ACs is their quiet operation. With the compressor and main fan located outdoors, its operational noise is drastically reduced. All you will hear indoors is the soft humming of the indoor fan spinning as it circulates the cooled air.
Effective And Precise Cooling
With the positioning of these mini splits, their cooling function is precise which is why it is usually positioned in strategic positions across the space. This allows different sections of a space to be cooled effectively.
Energy Efficiency
The power consumption of these units is far lower than what traditional HVAC units will consume. The savings you make from this can in the long run offset the initial high installation cost, giving you a great ROI.
Health Benefits
Every indoor unit has a filter installed. This filters the air, making it cleaner than it was. In addition to this, modern units come with ionization function that removes bacteria from the air, making it purer and healthier.
Cons
Now that we’ve looked at the benefits that these ACs offer, let’s also look at some of the cons that may come with their use. These include:
Installation Cost
The first con that you may come across is the initial installation cost. Unlike central systems, you will need to install these mini units in every space where you need the air cooled. The cost can add up, but like we noted above, the savings you will make from energy savings can make up for this initial cost over time.
Aesthetic Value
While these units are not necessarily unsightly, they have to be mounted where they are visible unlike the central variations that can be more discrete. There are however different designs that are marketed to make up for this. In fact, some have a frontal space where artwork can be mounted, making it look like a piece of artwork rather than an indoor cooling unit.
Conclusion
We’ve taken some time to explain what mini splits are and how they operate. We’ve also looked at some of the pros and cons that they offer. With this information, you can now decide if this is something you will love to install in your home or office space.
Read Also :
Know Why Content Marketing Is Important For SEO
4 Points To Consider When Creating A Great Content Marketing Strategy Today
How To Deal With Debt By Doing Business Marketing Smartly?
When it comes to renovating or building a new space, one of the most crucial aspects is the flooring installation process. The type of flooring you choose can significantly impact the overall aesthetics, functionality, and durability of your space. In this comprehensive guide, we will walk you through the intricate process of flooring installation toronto, providing valuable insights and tips to ensure a successful transformation.
Selecting The Right Flooring Material
The first step in the flooring installation process is choosing the right material. Whether you opt for hardwood, laminate, vinyl, tile, or carpet, each material has its unique features and benefits. Consider factors such as your budget, the room's purpose, and your design preferences when making this decision.
Measuring And Preparing The Space
Before the installation begins, accurate measurements of the room are crucial. This step ensures that you purchase the right amount of flooring material. Additionally, you'll need to prepare the space by removing any existing flooring, baseboards, and furniture. A clean, level surface is essential for a smooth installation.
Acclimating The Flooring
Many flooring materials, especially hardwood, need to acclimate to the room's temperature and humidity levels before installation. This process prevents the flooring from warping or expanding after installation. Follow the manufacturer's recommendations for acclimation time.
The Installation Process
Subfloor Preparation
A stable subfloor is the foundation of a successful flooring installation. Ensure that the subfloor is clean, dry, and free of any irregularities. Repair any damaged areas and add an underlayment if necessary.
Layout And Design
Planning the layout of your flooring is crucial for achieving a polished look. Decide whether you want a diagonal, herringbone, or straight pattern, depending on your design preferences. This step is especially important for tile and hardwood installations.
Cutting And Fitting
Precise cutting and fitting of the flooring material are essential for a seamless finish. Use the appropriate tools, such as a saw or cutter, to trim the material to fit the room's dimensions accurately. Pay special attention to corners and edges.
Installation Method
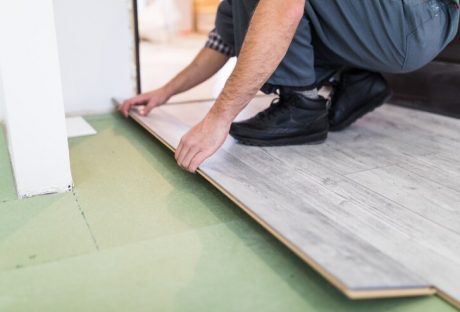
The installation method varies depending on the type of flooring you've chosen. For example, hardwood may be nailed or glued down, while laminate often features a click-and-lock system. Follow the manufacturer's guidelines and use the appropriate adhesives or fasteners.
Finishing Touches
After the main installation is complete, it's time for the finishing touches. Install baseboards and transitions to create a polished look. Seal gaps and joints to prevent moisture and dirt from seeping underneath the flooring.
Maintenance And Care
Cleaning And Maintenance
Proper maintenance is crucial to ensure the longevity of your new flooring. Regularly sweep or vacuum to remove dirt and debris. Use manufacturer-recommended cleaning products to maintain the flooring's finish.
Repairing Damage
Accidents happen, and flooring can get damaged over time. Whether it's a scratch on hardwood or a chipped tile, knowing how to repair minor issues can extend the life of your flooring. Consult with professionals for major repairs.
The flooring installation process is a transformative journey that adds beauty and functionality to your space. By carefully selecting the right material, preparing the space, and following the installation steps, you can achieve stunning results that will stand the test of time.
Read Also:
How To Pick The Perfect Flooring For Your New Home
How to Protect Your Wood Flooring in a Busy Household
List of Most Durable Kitchen Flooring













 If there are any holes or cracks in your doors, you can fill them with a wood filler, gypsum plaster, or a filling compound. Put a small amount of wood filler or filling compound on a putty knife and put it into the hole or crack uniformly. Place it as uniformly as possible and leave it to dry for at least two hours.
Check the filling the next day, and it requires more filling, add the required amount of filling compound to fill the space completely.
If there are any holes or cracks in your doors, you can fill them with a wood filler, gypsum plaster, or a filling compound. Put a small amount of wood filler or filling compound on a putty knife and put it into the hole or crack uniformly. Place it as uniformly as possible and leave it to dry for at least two hours.
Check the filling the next day, and it requires more filling, add the required amount of filling compound to fill the space completely.
 Many homes have paneled doors and the technique to paint them is different from painting a flat door. Paint every panel beginning from the upper left side downwards in a sequence.
Always use a brush of appropriate width to paint a paneled door. Don’t worry if you paint a bit outside the edges of a panel. Once the edges are painted, use a small roller to paint the space between the panels.
If the rollers of appropriate size are not available, use a 2-to-4-inch brush to paint the center of the panels.
Many homes have paneled doors and the technique to paint them is different from painting a flat door. Paint every panel beginning from the upper left side downwards in a sequence.
Always use a brush of appropriate width to paint a paneled door. Don’t worry if you paint a bit outside the edges of a panel. Once the edges are painted, use a small roller to paint the space between the panels.
If the rollers of appropriate size are not available, use a 2-to-4-inch brush to paint the center of the panels.