Home Maintenance Tips To Keep Your Home In Good Condition

Published on: 28 February 2023 Last Updated on: 11 February 2026
Home Maintenance

Owning a home includes a good deal of responsibility.

Homeowners have dozens of minor tasks they need to keep up with if they want to avoid paying for costly repairs. With adequate preparation, though, the many maintenance tasks required of homeowners can be performed easily without taking up too much time.

Read on to find brief checklists for monthly and seasonal tasks that will make it easier to stay on top of everything.

Spring Maintenance Checklist

Spring Maintenance

Winter can wreak havoc on a home, and everyone looks forward to using spring as a time to get outside and away from the house, but homeowners should take care of a few things first.

For example, spring is the best time to handle major projects like scheduling roofing services and repairs to address any damage done during the winter. Most homeowners also find that a small amount of work early in the season can help them prevent some extra hassles when summer approaches. Be sure to tackle the following.

Spring cleaning, both inside the home and in the yard.

Tree inspections to find signs of damage from winter storms.

Reseeding and fertilizing the lawn.

Properly servicing and storing seasonal equipment from winter, such as snow blowers.

Conducting a full inspection of the home’s exterior, including its roof, gutters, and paint.

Giving the house a quick scrub.

Cleaning the deck or patio.

Opening the pool for summer.

Summer Maintenance Checklist

Getting the bulk of the major landscaping and exterior maintenance or repairs done in the spring gives homeowners more time to enjoy the summer. That said, they’ll still need to take care of a few things regularly, including the following items. 

Turning on the sprinklers for the season once the rain ends.

Mowing the lawn and weeding the garden every week.

Keeping the pool clean by scrubbing it twice a month and checking chemical levels weekly.

Completing weekend home improvement projects while the weather is nice.

Fall Maintenance Checklist

Just like spring brings a lot of work with it because it represents the changing of the seasons, fall home maintenance requires a lot of advanced planning for the winter months ahead. Important tasks to remember include the following.

Planting perennial flowers, trees, and shrubs.

Harvesting annual plants.

Raking leaves.

Cleaning gutters.

Turning off the sprinkler system.

Stacking firewood for winter.

Cleaning, closing, and covering the pool.

Winter Maintenance Checklist

Winter Maintenance

Most modern families hunker down for the winter and don’t worry too much about home improvement projects. However, there are some maintenance issues that must be handled in the early winter. They include these items.

Preparing the snowblower for the season.

Stocking up on ice melt and other supplies.

Coming up with a plan for dealing with ice dams.

Checking the emergency generator to make sure it’s in good working order.

Monthly Maintenance Checklist

Not all home maintenance tasks are seasonal. Some must be performed every month of the year. They include the following elements.

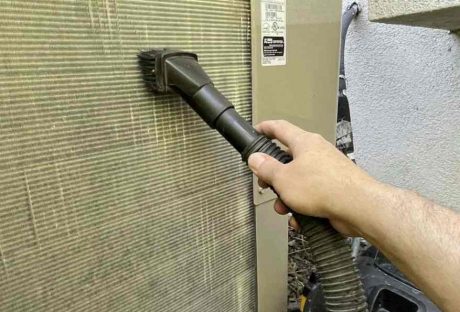
Changing HVAC filters.

Inspecting major home systems.

Checking the plumbing system for damage.

Restocking cleaning supplies.

Checking and cleaning gutters.

Performing a full walk-through of the property.

Know When to Hire a Pro

Basic home maintenance tasks are easy enough to perform for someone with a DIY mindset. However, major repairs and renovations are best left to professionals. This is particularly true of projects like roof maintenance, plumbing repairs, and major landscape changes.

Read Also:

  • Cleaning Your Home with Pets – The Most Common Problems
  • Home Maintenance Plans And Cleaning Tips During Covid-19
  • Some Facts You Need to Know About Rainwater Harvesting

Arnab is a professional blogger, having an enormous interest in writing blogs and other jones of calligraphies. In terms of his professional commitments, He carries out sharing sentient blogs.

View all posts

Leave a Reply

Your email address will not be published. Required fields are marked *

Related

Concreting Solutions

Ideal Concreting Solutions For Your Home

Choosing the right concreting solutions is a cornerstone in the journey of constructing or renovating your home. It not only guarantees durability and structural integrity but also elevates the aesthetic appeal of your living space. Concrete, with its unmatched versatility, stands as a pillar in residential construction, marrying the qualities of strength, longevity, and design flexibility. As we delve into the realm of concreting solutions suitable for various facets of home construction, from the foundational elements to decorative finishes, it becomes evident how these solutions significantly enhance both the functionality and appearance of our homes. Understanding Different Types of Concrete Concrete comes in various forms, each suited to specific applications in home construction. Here's a look at the primary types: Standard Concrete: The foundation of most construction projects, known for its strength and durability, suitable for driveways, sidewalks, and structural foundations. High-Strength Concrete: Offers enhanced durability and load-bearing capabilities, ideal for areas requiring superior strength. Lightweight Concrete: Used where less structural mass or better insulation is needed, it provides thermal efficiency and is easier to work with. Decorative Concrete: Enables aesthetic customization for home exteriors and interiors through options like colored, stamped, or polished concrete. Benefits of Concrete in Home Construction The benefits of using concrete in home construction are manifold. Its durability stands up to extreme weather, heavy traffic, and the wear and tear of daily life, ensuring structures that last generations. Concrete's thermal mass contributes to energy efficiency, helping maintain consistent indoor temperatures and potentially lowering energy costs. Moreover, its versatility allows architects and builders to explore creative designs, molding concrete into various shapes and finishes to complement any architectural style. Innovative Concreting Techniques for Homes Innovative concreting techniques, such as stamped concrete, polished concrete, and concrete overlays, push the boundaries of traditional concrete applications, offering homeowners unique ways to enhance the aesthetic appeal of their exteriors and interiors. Stamped concrete introduces textures that mimic natural materials, while polished concrete floors bring a sleek, high-gloss finish to any room. Concrete overlays provide a fresh look for existing concrete surfaces without the need for complete replacement, making them a cost-effective option for renovations. Choosing the Right Concrete for Your Project Selecting the appropriate concrete for your endeavor requires a thorough assessment of your project's unique demands, whether it's for construction or renovation. This entails evaluating the visual goals you aim to achieve, the structural requirements essential for stability and safety, and the adaptability of the materials to the specific climate conditions in your area. Additionally, financial considerations are pivotal in this selection process. The cost implications of various concrete types and their associated finishing methods can significantly influence your final decision. Engaging a Perth concreter, such as Project Concrete, ensures expert guidance in navigating these considerations, guaranteeing that your choice aligns with both your aesthetic preferences and budgetary constraints. Maintenance and Care for Concrete Surfaces Maintaining concrete surfaces is straightforward, involving routine sealing to protect against moisture and stains, regular cleaning to preserve appearance, and prompt repair of any cracks or wear to prevent further damage. Such care ensures the longevity and beauty of concrete installations, contributing to the overall value of your home. Disadvantages Of Concrete For Home When building concrete slab foundations, constructors are aware of the reason why it needs to be freezed. Apart from the worry that the foundation might crack, there is also concern about cost savings. One  thing that you might not have to worry about at all is when you use concrete for your home, it is quite safe. There is no problem when it comes to the base of the house and how it might decrease the risk of damage with regards to the instances of buying or building a home with concrete. There are several benefits which we have already mentioned, however, there are some drawbacks as well. You need to go through the disadvantages of using concrete so that you can consider all pros and cons. This will help you in understanding the need for concrete or should you choose another option when building a home. Read about the drawbacks that are described below in detail. You can decide on your own regarding making the choice of whether or not you would like to choose concrete as your choice for the house site! Labor Not everyone knows how to use concrete and accordingly, they know how to implement the concrete and tools that will help in building concrete structures. It is quite common to understand that you will need to learn about how concrete works and efficiently work on looking for laborers. These laborers must know how to use concrete and the tools or else it might be difficult especially when the process is expensive! Cost Using concrete is one of the most expensive ways of building a house! There is labor, material costs, transportation costs and market competition. When evaluating the conditions based on which you are building a house, there can be serious concerns regarding the expenses of a traditional home. Several factors influence the way your house is built! I agree that there are long term benefits to the use of concrete however, it can significantly impact your costing and budgeting when building a house. Pests With concrete becoming the foundation of your house, there can be a chance that there can be pests such as roaches and termites. Considering the house is closer to the ground, the insects and pests can easily enter through the walls accessing the infrastructure of the house. It will severely impact the woods across the house along with concerns if you sit on the ground! Heating And Cooling If there is a unit for air-conditioning or there is a furnace installed, there is a high chance that it will affect the concrete. These devices when installed in the ground floor will take up room directly impacting your purpose. Slab Cracks One of the most potential concerns when using concrete is that there can be cracks in the concrete! Now that we have already discussed about it being costly, it can be expensive to repair the house especially when there are cracks. It will look bad! Do you wonder how these cracks have developed? Earthquakes, frozen ground or tree roots are common concerns due to which the cracks in the concrete appear. Conclusion In conclusion, concrete offers a versatile, durable, and aesthetically pleasing solution for home construction and renovation projects. By understanding the different types of concrete, their benefits, and the innovative techniques available, homeowners can make informed decisions that meet their structural and design needs. Whether laying a new foundation, upgrading a patio, or seeking durable and stylish flooring options, the right concreting solutions can significantly enhance the livability and appeal of your home, ensuring it stands the test of time. Learn More About: 10 Points To Remember If You Are Building A Residential House Home Decoration At Its Best: 7 Key Ideas To Recreate Your Home Making Your Home Strong From Within: Tips To Build A Sturdy House

READ MOREDetails
how to harvest sunflower seeds

How To Harvest Sunflower Seeds: A Fun And Easy Activity For The Whole Family

Sunflowers are not only beautiful and cheerful, but they also produce delicious and nutritious seeds that you can enjoy as a snack or use in various recipes. Harvesting sunflower seeds is a fun and easy activity that you can do with your whole family. It is also a great way to teach your kids about nature, gardening, and healthy eating. In this article, I will show you how to harvest sunflower seeds in a few simple steps, as well as some tips and tricks to make the most of your sunflower harvest. If you enjoyed reading my blog on harvesting lettuce, you will enjoy reading this one! So, if that is what you are interested in knowing, I have you covered! Keep reading this blog till the end to learn more… How to Grow Sunflower Seeds: A Simple and Rewarding Gardening Project? Sunflowers are one of the most iconic and cheerful flowers in the world. They are also one of the easiest and most rewarding plants to grow from seeds. Sunflowers can brighten up your garden, attract pollinators, provide shade, and produce edible seeds that you can harvest and enjoy.  In this part of the article, I will show you how to grow sunflower seeds in a few simple steps, as well as some tips and tricks to make the most of your sunflower growing experience. How to Choose Sunflower Seeds? The first step to growing sunflower seeds is to choose the right seeds for your garden. Sunflowers come in a wide range of sizes, colors, shapes, and types. Some of the most common types of sunflowers are:  Giant sunflowers These are the tallest and largest sunflowers, reaching up to 15 feet in height and 12 inches in diameter. They produce huge and heavy flower heads that are filled with large and plump seeds. They are ideal for creating a dramatic and impressive display in your garden, as well as for harvesting large quantities of seeds. Some examples of giant sunflowers are Mammoth, Titan, and Kong. Dwarf sunflowers These are the smallest and shortest sunflowers, growing up to 3 feet in height and 6 inches in diameter. They produce smaller and lighter flower heads that are easier to manage and maintain. They are ideal for growing in containers, pots, or small spaces, as well as for adding a splash of color and charm to your garden. Some examples of dwarf sunflowers are Teddy Bear, Sunny Smile, and Little Becka. Colored sunflowers These are the most diverse and colorful sunflowers, ranging from yellow, orange, red, pink, purple, brown, and even green. They produce medium-sized flower heads that are attractive and eye-catching. They are ideal for creating a vibrant and varied display in your garden, as well as for cutting and arranging in bouquets or vases. Some examples of colored sunflowers are Autumn Beauty, Moulin Rouge, and Lemon Queen.  Things to Consider While Choosing Sunflower Seed When choosing sunflower seeds, there are several things that you need to keep in mind. For instance, you should also consider the following factors: Climate and season of your area Sunflowers are warm-season plants that need full sun and warm temperatures to grow and bloom. They are best planted in late spring or early summer, after the last frost, when the soil is warm and moist. If you live in a cold or frost-prone area, you can start your seeds indoors and transplant them outdoors when the weather is favorable. Soil and water conditions of your garden Sunflowers are adaptable and tolerant plants that can grow in most types of soil, as long as they are well-drained and fertile. They prefer slightly acidic to neutral soil with a pH of 6.0 to 7.5. They also need regular watering, especially during the germination and flowering stages. However, they can withstand some drought and dryness once they are established. Space and support available in your garden Sunflowers are large and sturdy plants that need ample space and support to grow and thrive. They should be planted at least 2 to 3 feet apart from each other and from other plants, to avoid overcrowding and competition. They should also be staked or tied to a fence, a trellis, or a pole, to prevent them from bending or breaking under their own weight.  How to Plant Sunflower Seeds? Once you have chosen your sunflower seeds, you can proceed to the next step. Planting sunflower seeds is a simple process that involves preparing, sowing, and caring for the seeds. Here is how to do it: Prepare the Soil Prepare the soil by loosening it with a fork or a spade. Ensure that you remove debris, weeds, or rocks. You can also enrich your soil by adding some compost, manure, or fertilizer, to boost its fertility and drainage. Make sure the soil is moist but not soggy, and has a temperature of at least 50°F. Sow the Seeds Sow the seeds by making holes or furrows in the soil, about 1 to 2 inches deep and 2 to 3 feet apart. You can use a ruler, a stick, or your finger to make the holes or furrows. Drop one or two seeds in each hole or furrow, and cover them lightly with soil. You can also sprinkle some water over the seeds to help them settle in the soil. Nurture Care for the seeds by watering them regularly, but not excessively, to keep the soil moist but not wet. You can also mulch the soil with straw, grass clippings, or leaves, to retain moisture and prevent weeds. You should also protect the seeds from birds, squirrels, or other animals, by covering them with a net, a cage, or a cloche. You should also thin the seedlings when they are about 4 to 6 inches tall, by removing the weaker or smaller ones, and leaving only the strongest and healthiest ones.  How to Grow Sunflower Seeds?  After planting your sunflower seeds, you can watch them grow and enjoy their beauty and bounty. Growing sunflower seeds is a rewarding and satisfying experience that requires minimal maintenance and care. Here are some tips and tricks to grow sunflower seeds successfully: Water Water your sunflowers regularly, but not excessively, to keep the soil moist but not wet. Sunflowers need about 1 to 2 inches of water per week, depending on the weather and the soil conditions. You can use a hose, a sprinkler, or a drip irrigation system to water your sunflowers. You should water them in the morning or evening, and avoid wetting the leaves or the flower heads, to prevent fungal diseases. Fertilizer Fertilize your sunflowers occasionally, but not excessively, to boost their growth and flowering. Sunflowers need a balanced fertilizer that contains nitrogen, phosphorus, and potassium, such as a 10-10-10 or a 20-20-20 formula. You can apply the fertilizer once or twice during the growing season, following the instructions on the label. You should avoid over-fertilizing your sunflowers, as this can cause them to grow too tall and weak, and make them prone to pests and diseases. Pruning Prune your sunflowers occasionally, but not excessively, to improve their shape and health. Sunflowers do not need much pruning, as they are naturally self-pruning and self-cleaning. However, you can prune them to remove any dead, damaged, or diseased leaves, stems, or flowers, to prevent infection and improve air circulation. You can also prune them to control their height and spread, by pinching or cutting off the tips of the main stem or the side branches. You should use clean and sharp scissors or pruners to prune your sunflowers and do it in the morning or evening when the plants are less stressed. When to Harvest Sunflower Seeds? The first step to harvesting sunflower seeds is to know when they are ready. Sunflowers typically bloom in the summer and their seeds mature in late summer or early fall. You can tell when your sunflowers are ready to harvest by looking at their appearance and feel. Here are some signs that your sunflowers are ready to harvest: Petals have fallen off or turned brown. The back of the flower head has turned yellow or brown. Seeds have developed black and white stripes. The seeds are plump and firm to the touch. If you are not sure if your sunflowers are ready to harvest, you can do a simple test by rubbing your thumb over the seeds. If they come off easily, they are ready to harvest. If they are still attached to the flower head, they need more time to ripen. How to Harvest Sunflower Seeds? Once you have determined that your sunflowers are ready to harvest, you can proceed to the next step. Harvesting sunflower seeds is a simple process that involves cutting, drying, and storing the seeds. Here is how to do it: Cut the flower heads from the stems using a sharp knife or scissors. Leave about 12 inches of stem attached to the flower head for easier handling. Place the flower heads in a dry and well-ventilated area, such as a garage, shed, or porch. You can hang them upside down or lay them flat on a screen or rack. Make sure they are not touching each other to prevent mold and rot. Let the flower heads dry for about two weeks or until the seeds are completely dry and hard. You can check the dryness by biting or cracking a seed. If it is crunchy and not moist, it is dry enough. Remove the seeds from the flower heads by rubbing them gently with your hands or a soft brush. You can also use a fork or a spoon to scrape them off. Discard any debris, such as petals, leaves, or insects. Store the seeds in an airtight container, such as a glass jar, a plastic bag, or a metal tin. Label the container with the date and the variety of sunflower. Keep the container in a cool and dark place, such as a pantry, a cupboard, or a basement. How to Enjoy Sunflower Seeds? Now that you have harvested your sunflower seeds, you can enjoy them in various ways. You can eat them raw or roasted, salted or unsalted, shelled or unshelled. You can also use them in salads, soups, breads, muffins, granola, trail mix, pesto, butter, and more. Sunflower seeds are rich in protein, fiber, healthy fats, vitamins, minerals, and antioxidants. They can help manage high cholesterol, blood pressure, and inflammation and boost your immune system, brain function, and mood. Here are some tips and tricks to enjoy your sunflower seeds: Roast To roast your sunflower seeds, spread them in a single layer on a baking sheet and bake them in a preheated oven at 300°F for about 15 to 20 minutes, stirring occasionally, until golden and crisp. You can season them with salt, pepper, garlic, onion, paprika, cumin, or any other spices you like.  Shell To shell your sunflower seeds, you can use your teeth, your fingers, or a nutcracker. You can also soak them in water for a few hours to make them easier to shell. To remove the shells, you can blow them away with a fan, a hair dryer, or your mouth, or you can shake them in a colander or a sieve. Sunflower Seed Butter To make sunflower seed butter, you need to blend the shelled and roasted sunflower seeds in a blender until it turns smooth and creamy. You can add a little oil, honey, salt, or vanilla to enhance the flavor and texture. You can use sunflower seed butter as a spread for toast, crackers, or fruit, or as a dip for pretzels, celery, or carrots. Pesto To make sunflower seed pesto, blend roasted and shelled sunflower seeds with fresh basil, garlic, olive oil, lemon juice, salt, and pepper in a food processor or a blender until smooth and thick. You can use sunflower seed pesto as a sauce for pasta, pizza, or sandwiches, or as a dressing for salads or roasted vegetables. Wrapping It Up! Harvesting sunflower seeds is a fun and easy activity that you can do with your whole family. It is also a great way to enjoy the beauty and bounty of nature, as well as the health benefits of sunflower seeds. By following the steps and tips in this article, you know how to harvest sunflower seeds in a few simple steps, as well as enjoy them in various ways. I hope you found this article helpful and informative. If there are any other queries related to the same, please feel free to let me know. All that yo need to do is scroll down till you reach the bottom of the page. Then leave your comments and suggestions in the box below. And I will be ether to answer them all for you!  Learn More About: Best Material for Garden Sheds: A Guide for Everyone Asparagus 101: When, How, And How Often To Harvest? Best Gardening Tips For Beginners: Adopting A Relaxing Hobby

READ MOREDetails
Trailing Indoor Plants

10 Best Trailing Indoor Plants To Buy In 2022

Your dream house needs some ornaments and decorations to stand out as the queen of all houses in your neighborhood. With trailing indoor plants, you can add the green your beautiful home was missing all this time. For the urban dwellers, it is almost impossible to live inside the greenery. But, using indoor trailing plants, you can bring the green into your house. Indoor plants are the lively jewelry of your home decoration, and it is no secret. It is only with the green plants that the brick walls and your house's concrete get the touch of life. Hanging a few vines here and there from the pots can add the touch of the goddess of green vines to your home. You can keep a trail of the indoor plants on the railing of the staircase. You can hang some of them from the porch ceiling of your house. Maybe you can keep one or two containing some low-light plants for the interior? As you start to live with the green, you add extra life and vivacity to your life. So now, if I have got you even a little bit interested in the indoor trailing plants, allow me to introduce you to the best trailing indoor plants that you can decorate your house with. 10 Best Trailing Indoor Plants You can invite the wild indoors with these incredibly pretty green trailing indoor plants mentioned in this article. 1. Trailing Indoor Plants: Golden Pothos Golden pothos is just as beautiful as healthy for your surrounding environment. Not only can they thrive in the low light, but they also keep the air around you pure and refreshed. They help eliminate odors and cleanse the air within your home with formaldehyde, benzene, and carbon monoxide. If you have to stare at the computer screen all day long, you can look at them to reduce the irritation. As for decorating the interior, it is one of the most beautiful trailing indoor plants that you can hang from the ceiling of your room or the balcony. Read More: Grow these flowering plants in your home garden 2. Trailing Indoor Plants: Satin Pothos Scindapsus pictus' Exotica' or satin pothos is another vine you can keep within your home. It grows slowly, and the beautiful green leaves are splashed with silver color. This plant takes only a little water to grow within low light. When 2 cm of the compost goes dry, you can water them. Even NASA recommends these plants for the refinement of indoor air. The satin pothos are easy to propagate, and they are low maintenance. Many people keep them as good luck charms. If you have a flower vase with a stand in the drawing-room, you can place one of these plants there. 3. Trailing Indoor Plants: String Of Pearls One of my favorites, Senecio Rowleyanus, or String of pearls, is another pretty member that you can add to your drawing room. The skinny stems of this plant grow green bubbles as if they are green pearls. During winter, tiny white flowers grow out of the String of pearls plants. These are cascading plants, and they can be the attraction of your home decor. It is a pretty trailing indoor plant that grows in low light and dry air. I will suggest you make a trail of these indoor green pearls. You can hang them from baskets or use a shelf to arrange a trail of baskets containing the String of pearls. 4. Trailing Indoor Plants: Burro's Trail You can easily grow, propagate, and maintain the Burro's trails. However, if you are worried about your children and pets, then allow me to assure you that these trailing indoor plants pose no harm to them. They are nonpoisonous plants and are easy to grow and maintain. You can lay them on top of a pot full of compost and grow them quickly within a few days' notice. The plant also requires minimal watering. You can water them when the 2 cm of the compost is dry. You can decorate the interior with a few small baskets of the Burro's tail hanging from the ceiling. Or, you can also keep them on top of the tables in the dining room. You May Like To Read: 4 Essential Tools Needed to Maintain Your Garden in the Winter 5. Trailing Indoor Plants: Red Herringbone Plant Maranta leuconeura, Red herringbone plant, also known as the prayer plant, is another beauty to decorate your interior. The attractive patterns of this plant will amaze you both during the day and at night. Growing this plant may take a little experience. They require only a little water, but you need to water these plants when the pot is dry. The prayer plant is one of the most common trailing indoor plants, which you can place on the table. 6. Trailing Indoor Plants: String Of Hearts Also known as the Chain of hearts, sweet vines, rosary vines, String of hearts is another pretty indoor trailing plant. These are easy to grow and propagate. They have tiny leaves with pink and purple shades, making your interior look prettier as they grow and thrive across your balcony. In addition, they create the best contrastive combination with a white wall or ceiling. If you are a beginner and not much of a career giver, the String of hearts will bear with you. This plant grows within low light and requires minimum water. 7. Trailing Indoor Plants: Boston Fern Do you want to keep a vase full of green and lively ferns on the tea table? If your need is something similar, you can consider giving the Boston ferns someplace within your house. You can hang them from the ceiling or shelves. But unlike the other plants here, they are attention seekers. They need your daily care; from ample lights, humidity and regular watering are a must. Do you have space beside your window? If you do, you can put them there. They shed dead leaves, so you also need to groom them occasionally. They are also excellent givers. And they keep the interior air fresh and maintain the moisture within the house. 8. Trailing Indoor Plants: Chain Of Cactus Rhipsalis paradoxa minor, or the Chain of cactus, grows pretty-looking white flowers during the spring. However, the winter stimulates the growth of these pretty flowers. These trailing interior plants are rich in antioxidants and vitamin C. These are best for big hanging pots. You can keep a wide vase full of the Chain of cactus and let them grow wildly. They require minimum water and light, although you need to be a little experienced to grow them properly. You May Also Like This: Best Material for Garden Sheds: A Guide for Everyone 9. Trailing Indoor Plants: Grape Ivy These trailing indoor plants are pretty underrated. The grape ivy is a good air purifier; they require moderate or low light to thrive within your interior. They also have antioxidant and anti-inflammatory benefits. You can hang one or two baskets of the grape ivy inside and be amazed as they keep shining while getting older. 10. Trailing Indoor Plants: Maidenhair Fern The cousin of the Boston ferns, not too distant from its relative, the maidenhair ferns take after the qualities of the Boston ferns. They also require lots of care, ample light, and regular watering. They indeed maintain the various hues of greenkeeping a dazzling look within the interior of your house. These trailing indoor plants possess anti-thyroidal, anti-diabetic, antifungal, wound healing, and anti-hair loss properties. So not only are they pretty, but they are quite beneficial for your health as well. Let The Trailing Indoor Plants Decorate Your Home Most of these plants only take a little care and light to grow healthy within the interior of your house. You can go from little pots of green plants to large vases full of them to decorate your interior wildly. These plants have some health benefits like refreshing the interior air or cleansing it. They are also good at keeping the air humid. If you are looking for such plants, I suggest you choose from any of these vines, pothos, cactuses, and ferns. Also, if you think that we have missed out on any valuable plant, you can let us know through the comment. Read Also: Garden Edging for Beginners How To Arrive At The Perfect Choice Of A Potting Bench For Your Gardening How To Install Artificial Grass In Your Garden – Installation Guide Step By Step

READ MOREDetails