Published on: 03 July 2021
Last Updated on: 22 April 2026
Most of the owners of Android have complaints regarding the Trash Folder on Android. If you have been using Android for an extended period, you must have dealt with the storage issues on your handset. Unlike Mac or Windows, there is not any specific location that collects the trash. Hence, you need to be one step ahead while cleaning clutters on your phone. Haven you not looked for a perfect solution to it everywhere? You might have because you are here, which means the issue is persisting. But today, you will not be disappointed anymore. In this article, we have noted small details regarding how to empty trash on android.
Do Android Devices Have A Trash/Recycle Bin?
The most straightforward answer to this question is; NO, Trash Folder or Recycle Bin are not present on Android Device. That’s great because this concept has to be clear beforehand. So, I hope you can sense that in this respect, the frameworks of Mac and Windows are completely different.It is owing to the limited storage that most smartphones have. The storage can range from 8 GB - 256 GB. Thus, it is not a viable idea to keep a folder for collecting trash from everywhere. However, specific applications, such as Photos, carry a particular folder called Trash for lately deleted items. Thus, if you would like to eliminate junk files, you have to open each app and remove unwanted data.Below, we have presented some feasible methods to kick the junk files out from your Android device.
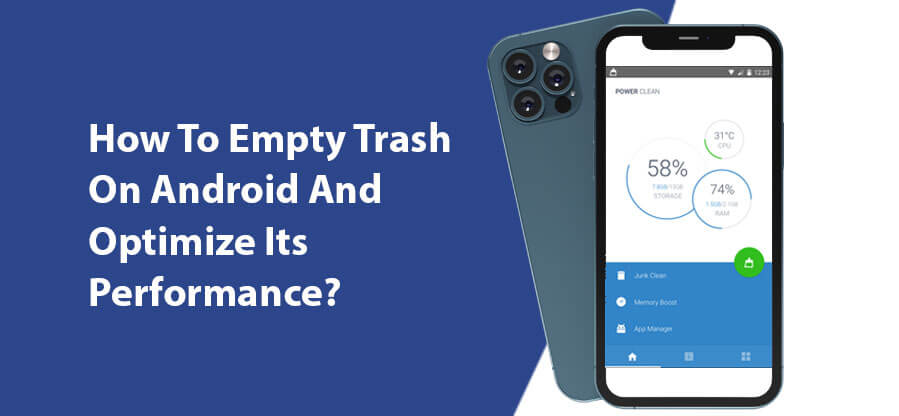
How To Empty Trash On Android And Optimize Its Performance?
Optimizing your handset is crucial to improve its overall performance. When you purchase a new Android phone, do you expect that this can become slow like a sloth after few months? Not only you but also nobody does that.Needless to say that, trash memory in different applications on Android could be highly frustrating. It can even be your nightmare as well. To boost your device, you need to delete the unnecessary files, clean the cache of apps and empty the trash folder.Although as there no such thing called ‘Bin’or ‘Trash’ in Android, you should follow the steps below diligently to understand how to empty trash on android.
1. Clear The Cached Data
The cache is a go-between data that your device saves to optimize your user experience. Nevertheless, it occupies your phone’s memory, and this, in turn, prohibits you from downloading or saving other items. Here is how you can delete cached data from an Android Device:
Go to the Storage tab under the Settings and click Cached data.
You will visualize options to delete the cache.
Select the ones you want to delete and follow the screen options.
Or if you want to delete the cache of individual apps, you can do it in this way:
Access the Settings
Hit the Apps
Choose the App whose cache you wish to remove
Click the Clear Cache Button, and there you go.
2. Remove The Downloaded Files
This is 2nd most crucial step, which many of us forget to execute correctly. Can you remember the last time when you deleted all your downloaded files? You can’t because you have not done it over a long time. Let me be obvious over here. Even if you do not use the downloaded files, they can still hold space in your Android’s internal memory. To clean up the storage, you require omitting them permanently from your device. Simply navigate to the Downloads Folder from File Manager. Then choose the files you do not need to access anymore and hit the Delete option. I bet you will be awestruck to see the amount of storage it would free up.
3. Uninstall The Unused Or Rarely Used Apps
It is another significant step in the roadway of ‘how to empty trash on android’. All of us have those apps on our phones that we have never used or use occasionally. Analyze whether you need them all. If not, you can clear plenty of memory by uninstalling the redundant ones. To do this, note the steps below:
Navigate to the Settings
Tap Apps
Select the application that you no longer require
Click on the Uninstall button, and BOOM, the memory would get boosted.
4. Get Third-Party Applications
Do you want to master the methodology of how to empty trash on android? Several applications are that can you can make use of to delete the junk from your device. Why don’t you try these? Let me explain to you the details before that.We recommend the most simple app to delete junk files from Android. They can access the trash files, thereby managing your phone’s storage. One such efficient application is Phone Cleaner. Install it now to augment your system’s performance.
5. Move All The Files To An SD Card
If you want to know how to empty trash on android from a different aspect, this step is for you. Sometimes the internal memory of an Android falls short for several users. The best thing that you can do then is to purchase a Micro SD card.We advise you to get your hand on an SD card of higher-end in terms of storage, preferably 128 GB or 256 GB. After that, you can store all your media, documents, files here and see enjoy the speed that your phone will regain.
The Final Thoughts
We often face storage issues, phone hanging issues, and many others, but we do not know its reason. What we do at first is blame the Android brand. But unfortunately, the main culprit is Trash Files or Junk Files. Consider cleaning your Android’s trash as a good habit and not as a task that you have to do. You can easily detect and clean junk files that you did not even know previously with these steps.
Subham Saha started his career as a professional web content writer. He has more than 3 years of experience in digital marketing. He also has a great knowledge in SEO, SMO, Website development, etc. He completed his graduation in Electrical Engineering. He is very passionate about building his career in the Digital marketing industry. Subham has a great interest in reading books about Business, Economics, Psychology, Technology, and History.
With the number of flagship smartphones entering the market today and the endless high-quality options for people on a budget, it’s become very challenging to choose the best smartphone. The smartphone market is flooded with thousands of phones, making it overwhelming for people who are not clear about what they want.
If you are one of those people, this post is for you. We shall discuss the top tips to help guide you in choosing the best smartphone. Let’s delve in.
1. OS platform
The operating system of your smartphone is very important. Now, the operating system you choose will largely affect the app ecosystem. These include the following: Android, iOS, Windows Phone, and Blackberry.
That is, if you pick an Android phone, you’ll have access to an enormous pool of apps. Almost all kinds of apps are available on Google Play Store. If you opt for iOS, it’s another story altogether.
Apple has a very small number of devices available in the market at any given time, which means that there are fewer opportunities to experience variety with your device. The Blackberry OS has now been completely phased out by the company that used to produce them.
This means that though iPhones can be seen as premium-looking phones, they lack diversity when it comes to models. This also implies that upgrading your iPhone without buying a new model isn’t possible.
All these facts mean that Android comes out on top in this category. It is the most flexible and diverse platform available, encouraging more developers to write apps for it.
2. Screen size and quality
The quality of the smartphone’s screen directly impacts how you view images and videos, as well as your experience when playing games or browsing the internet. A good smartphone must have a high-resolution display, which will allow you to view things clearly in different light sources at different angles.
Gamers should buy smartphones with the highest pixel density possible if they want excellent picture clarity while indulging in their hobby. Phones with lower resolutions are not advised for people who wish to sharpen images.
3. Processor
This is one of the most important factors to consider when buying a smartphone. The processor decides how fast your apps will load and impacts your phone’s performance in general. You should purchase phones with CPUs that are at least 1GHz or more in speed to receive reliable performance at all times.
Be aware of smartphones that come with processors less than this threshold, though, because they often lag during operation and may even freeze randomly while using them.
4. RAM
Another vital part of your smartphone’s hardware configuration is its RAM (Random Access Memory). This helps your phone run multiple tasks simultaneously without slowing down or hanging up on you mid-way. The higher the RAM, the more tasks your phone will be able to handle at once.
However, there are no specific or minimum requirements for smartphones these days. You should, however, make sure that you buy a smartphone with 4B of RAM or more if you want it to perform reliably without lagging.
5. Battery power
Though smartphones have become incredibly sophisticated in recent years, battery life remains an issue for all. Consumers should choose devices that come with batteries between 3500mAh and 5000mAh capacity to receive decent battery performance from their phones.
According to the experts from Hartman’s Jacksonville appliance repair, if you’re not too concerned about how long your phone lasts on a single charge and tend to carry around chargers everywhere you go, you can choose phones with lower battery capacity as well. However, those who go out for an hour of jogging will find that phones with lower battery capacities may die on them before they know it.
6. Operating System Version
It is important to know which version of the operating system your phone is running. If you want to buy a smartphone that will receive regular software updates and security patches from its manufacturer, make sure you purchase devices working on Android 10.0 or later versions of the Android platform. For iOS users, Apple offers upgrades regularly, including bug fixes and minor enhancements, so this aspect doesn’t matter as much as it does for Android users.
7. Storage space
Storage space is another important consideration when buying a smartphone. Though smartphones have to offer much less storage space than traditional laptops and PCs, consumers can get decent storage performance from them by opting for devices that come with at least 32GB of internal memory or more.
However, such large memories tend to drain the battery quickly, so it will be best if you select phones that house both an SD card slot and at least 64GB of fast internal memory. That way, you’ll be able to store all of your media files and still receive good battery life from your smartphone.
8. Camera
As with storage space, smartphones now offer much better camera quality than traditional digital cameras. However, you should ensure that the smartphone’s camera you intend to buy is at least 12MP to receive good picture clarity. Also, opt for phones with a front-facing camera since these are quite useful when taking selfies and using video calling services. Additionally, focus on devices with larger aperture values to let in more light into their cameras and produce well-lit photos even in low lighting conditions.
Read Also:
How Smartphone Tracking Programs assist Parents in Controlling their Children
5 Ways to Stream Free Movies and TV Shows on Your Smartphone
How To Make Money With Your Smartphone
Smartphone Addiction In Our Era
The promise of free is the oldest marketing trick in the book. But I must agree that in the digital age, it has taken on a new, more viral form.
If you’ve spent any time on WhatsApp groups or Instagram Reels lately, you’ve likely encountered Online Jude.com.
It’s a name that has become synonymous with the promise of 5G data packs.
Additionally, I have also seen that it will promise you unlimited talk time. In fact, you might just get instant mobile top-ups for providers like
Jio
Airtel
Vi
But does Online Jude. com actually deliver on these promises? Or is it merely a sophisticated portal designed to harvest user data?
In this exhaustive 2026 guide, I will peel back the layers of this platform and analyze its technical validity.
Additionally, I will also provide you with safer, verified alternatives. So, you will keep your phone connected without risking your digital security.
What Exactly Is Online-Jude.com?
Online Jude.com is a web-based platform that claims to offer users free mobile recharges in exchange for completing simple digital tasks.
Unlike official telecom apps, this site operates as a third-party intermediary.
It positions itself as a rewards portal where your time (spent on surveys or ads) is converted into telecommunication currency.
The Mechanics of the Free Claim
The site typically operates through a three-step funnel:
Firstly, you have to choose your mobile service provider (Jio, Airtel, Vi, or BSNL).
Secondly, you enter your mobile number and select a plan (e.g., the 719 INR 84-day pack).
Finally, this is where the process slows down. To unlock the recharge, you are asked to download apps.
Additionally, they will also ask you to watch videos. In fact, they will also ask you to share the website link with 10-15 friends on WhatsApp.
Why is Online Jude Com Trending In 2026?
With the rising costs of 5G data plans in India, users are increasingly looking for ways to offset their monthly expenses.
According to market analysis by Capsule Info, sites like Online Jude.com thrive on social proof.
Additionally, they often feature scrolling tickers of Recent Winners. Also, I have seen them featuring fake Facebook-style comments.
You can see these at the bottom of the page to build immediate, albeit false, trust.
1. The Technical Reality Check: Can A Website Gift You A Recharge?
To understand if Online Jude.com is legitimate, we must look at how mobile recharges actually work.
In the telecom industry, recharges are handled through API (Application Programming Interface) integrations.
This happens between a payment gateway and the telco's backend.
2. The Missing Link: No Official Integration
Legitimate platforms like Amazon Pay or Paytm have massive legal agreements and technical handshakes with companies like Reliance Jio.
When you pay them, they send an encrypted signal to Jio’s server to update your balance.
Online Jude.com lacks these integrations.
There is no evidence that this site has the technical authority to trigger a recharge on a secure telecom network.
Most recharge generators on such sites are merely visual scripts—they show a progress bar that looks like a hacking process, but no data is actually being transmitted to your service provider.
3. The Survey Loop: A Circular Dead End
One of the biggest frustrations reported by users is the infinite task loop.
You might spend 30 minutes downloading apps and filling out forms, only to be told you need to complete one more offer.
This is a classic CPA (Cost Per Action) marketing tactic.
The site owner gets paid by advertisers for every app you download, but you never receive the promised reward.
What Are The Cybersecurity Red Flags Related To Online Jude Com?
While the loss of 30 minutes is annoying, the security risks associated with Online Jude.com are far more serious.
When you interact with unverified reward sites, you aren't just a user; you are a data point.
1. Phishing And Identity Theft
Of course, first it asks for your mobile number. Additionally, it will also ask for your service provider.
In fact, it will sometimes even ask for your name or location. Then, Online jude.com builds a lead profile.
In addition, this data is often sold to third-party telemarketers. In fact, worse, scammers use it for targeted phishing.
Have you noticed an increase in Work from Home or Part-time Job spam messages lately? These sites are often the source.
2. Malware And Adware Risks
The Task Wall often requires you to download APK files or apps from outside the official Google Play Store.
These files can contain overlay malware. I have seen scripts that sit silently on your phone and wait for you to open your banking app.
Trust me, exactly at this point, they record your login credentials.
3. The Telegram Scam Funnel
Many users are redirected from Online Jude.com to Official Telegram channels.
These groups often promote color trading games or investment schemes that promise to double your money.
As noted by The Hindu’s recent cybercrime report, these funnels are a major gateway for financial fraud in 2026.
What Are Some Legitimate Ways To Get Free Data And Recharge In 2026?
If you truly want to save money on your mobile bills, I hear you.
Then, I suggest that you stop looking for generators. Additionally, you must start using verified cashback ecosystems.
Yes, I know that these methods are slower. But they are guaranteed and safe.
1. The Airtel Thanks And Myjio Official Offers
Both Jio and Airtel frequently run Daily Data challenges.
Wait, I will give you a suitable example. As we all know, the MyJio app often has an Engage section.
Here, we watch a short 30-second ad for a brand like Cadbury or Intel. Then, it can earn you 100MB to 1GB of instant data.
I can assure you that these are 100% official and safe.
2. Google Opinion Rewards
This remains the gold standard for earning digital credit. So, you just have to answer 3-4 simple questions about your recent shopping trips.
In fact, it can also be about your YouTube habits. Then, you earn Google Play Credits.
Additionally, you can then use these credits to pay for recharges on apps that accept Play Balance as a payment method.
3. UPI Cashback Portals (PhonePe And Amazon Pay)
I would always suggest that you don’t search for free.
Rather, I would say that you look for discounts. Amazon Pay regularly offers First Recharge of the Month cashbacks.
Also, it ranges from 10 INR to 50 INR.
Over a year, this adds up to one full free month of service.
4. Rewards And Trusted Gpt Apps
Apps like mRewards (available on the Play Store) allow you to earn points by playing games.
These points can be redeemed for Paytm Cash, which is as good as real money for recharges.
Unlike Online-jude.com, these apps have a transparent payout system and millions of verified reviews.
5. Credit Card Reward Points
If you or your parents use a credit card, check the Reward Redemption section.
Many banks now allow you to settle your mobile bills directly using accumulated points, effectively making the recharge free.
Why Sites Like Online Jude.com Rank So High?
You might wonder: If it's a scam, why is it on the first page of Google? The answer lies in Aggressive SEO and Viral Loops.
These sites use Expiring Content strategies. They create thousands of Backlinks from bot-driven comments and social media shares.
Because so many people search for the keyword free recharge, Google's algorithm sometimes mistakes the high traffic for authority.
However, as Backlink’s authority guidelines suggest, Google is getting better at identifying low-value sites.
In addition, I must add that most of these domains are flagged. Also, they are removed within 6-12 months.
But they would pop up again under a slightly different name (e.g., Online-jude.net).
Here’s My Final Take On Whether You Should Go For Online Jude.com
In the world of cybersecurity, Value Exchange is a very significant concept.
Let’s say a business gives you a 719 INR recharge. Then, they need to earn at least 720 INR from your presence on their site.
Additionally, a few banner ads and a survey do not generate that kind of revenue.
Online Jude.com is a digital mirage essentially. It leverages the desperate need for affordable connectivity.
Then, it builds a massive database of active mobile users.
While the dream of free 5G is enticing, the risk of identity theft and financial fraud is far too high.
So, I would suggest that you stick to the official apps. You can use:
MyJio
Airtel Thanks
Google Opinion Rewards
They might not give you unlimited everything for free. But they won't sell your digital soul to the highest bidder either.
Mobile phones have become the need of everyone nowadays. People can find a wide range of mobile phones in various brands. Moreover, you can find the countless specifications of mobiles that have been offered by different mobile companies. If you're looking for a cost-effective mobile phone, HONOR 10 lite consider as the best option. It consists of incredible features that fulfill all your needs. Its features are given below that can help you to pick Honor 10 lite.
HONOR 10 Lite comes with TUV Rheinland's well-received safety display certification. In essence, a built-in "eye protection" mode can be arranged to cut off blue light. It is comfortable and warm to read.
About HONOR 10 Lite
HONOR 10 Lite is listed in the UK. This is a good-looking mobile phone, especially its unique gradual sky blue form. It tends to be the first HONOR smartphone that gives the 6.21-inch dewdrop display. As well as it provides an impressive cinematic display. It is available in 64 GB storage and also you can get it up to 512 GB. Honor 10 lite offers a 24MP front camera with multi-frame image processing technology.
Additionally, you can find the AI portrait beauty and enhance the photography light. You can also get the eight different selfie scenarios that help to make your pictures perfect. Moreover, skin smoothing and color adjustments are also adjustable according to your desire.
The front panel of the HONOR 10 Lite is controlled by a 6.21-inch IPS LCD panel with an aspect ratio of 19.5: 9. HONOR claims to be able to reach 91% of the screen. Most of the reason can be attributed to the fact that you will get a small dewdrop gap. Part of the reason for this good screen performance is the small chin at the bottom.
HONOR is one of the few brands that make smaller chins using chip-on-film technology. It is not close to Apple's achievements through bending the AMOLED panel on the iPhone XS. The HONOR 10 Lite is one of the few mobile phones with an ultra-thin chin, just like the HONOR 8X.
Dewdrop notch can ensure that it will appear in your sight, just act as a small spot. Within this price range, there are more "bomber guns" games played on this screen than any other mobile phone. The side frame is thin, which does no harm.
Also, its intelligent AI camera function is popular with consumers. It supports intelligent identification of calories, famous cars, etc. It can support users to operate it with one hand by full-screen gestures.
In terms of hardware, GPU performance is improved by 130%. The new generation Kirin 710 chip and flagship A73 core design are adopted. It brings surging power under lower power consumption. With 3GB of high-speed memory blessing, it brings a more carefree drag racing experience. With 64GB of large storage, mobile phones can be used as hard disks. GTU Turbo 2.0 can bring users a carefree game experience with a high frame rate. The technology is upgraded, supporting more popular games. It accelerates graphics processing with hard and soft cooperation. It brings a stable game experience with a high frame rate.
The manufacturers use Kirin 710 chipset. The chipset has been designed with the latest independently-developed system. You can get seamless gaming through this chip. Also, it offers the Smart Shock and immersive 3D audio that makes the sound quality best.
It consists of eight-layer colors that display the various waves of lights through different angles. Its sophisticated colors make this phone more attractive. It is available at a very affordable price with incredible features.
Besides, AI-blessed communication technology can identify the status of entering and leaving the elevator. It can restore a 4G network connection after leaving the elevator. AI anti-counterfeiting base station realizes chip-level anti-counterfeiting. It supports a 4G anti-counterfeiting base station. This can intercept fraudulent information brought by a fake base station and make mobile phones safer to use.
AI active noise reduction is supported on the call. It can give users a clearer fairy tale experience. In addition to these black technologies, the price of HONOR 10 Lite makes it cost-effective. During the promotion period, it costs 129.99 pounds. Friends who are enchanted can buy it.
Features of HONOR 10Lite
Let's know some more features of Honor 10 lite that make this phone cost-effective. It has some great specifications that fulfill all your needs and requirements.
Network
Honor 10 Lite is available in-network provider as well as the sim card type. It is based on your need that what you want to buy. It gives the 2G, 3G, and 4G network capability with nano-SIM. You can use this phone with both SIM and network provider.
Display and design
It is available in a 6.21 inch LCD with vibrant colors. Its pixel density is 415-pixel pr inches with a touch screen and toughened glass.
Dimensions
Its size and dimension are amazing and user-friendly. It is very lightweight and can be easily used. Its total weight is 162g, and its size is H154.8.
Camera and video
It has a wide range of camera through which you can get professional pictures. It has a dual camera, and the front camera is 24 MP and the rear camera 13 MP, as well as you can find 1080 HD quality videos. This smartphone can capture your moment spectacularly. If you have Honor 10 lite, you do not need to buy any other camera for capturing images and videos.
Storage
Every mobile phone buyer considers storage memory first. The honor 10 lite offers you the best storage. The internal memory is 64 GB that can be extended up to 512 GB. As well as it has a memory card slot that supports help to boost the storage of your mobile phone. You can save a large amount of data in Honor 10 lite.
Technical specifications
Technical specification tends to be an essential part of any smartphone. It shows the memory and software that has been using on phone. Honor 10 lite consist of a 2.2GHZ octa-core with 3GB RAM. Moreover, its operating system is Android 9.0.
Battery timing
Battery timings matter a lot while purchasing any smartphone. Honor 10 lite offers up to 653 hours standby time and up to 1200 mints talk time. Moreover, the capacity of the battery is 3400mAh.
Product features
It consists of MP3 and MP4 player with a headphone port. It has fast charge technology as compared to standard charging. Moreover, you can get the facility of a simple, speedy, and safe fingerprint scanner. It helps you to give better security and makes it easier to unlock the phone only for you.
Connectivity
It can be easily connected through WIFI, Bluetooth, NFC, and GPS. In this way, you can easily connect your phone with other devices.
In a nutshell, a large number of smartphones in different brands are available in the market. But every user wants to buy the most featured phones at an affordable price. When we compare the cost and features, honor 10 lite tends to be the best option. It has tremendous features at an economical price and fulfills the needs and demands of every user.
Read Also:
Cost-Effective Custom Mobile Accessories Packaging for your Small Business
5 of the Coolest Cases for the iPhone 6S
How to Estimate Your Mobile Project


 The most straightforward answer to this question is; NO, Trash Folder or Recycle Bin are not present on Android Device. That’s great because this concept has to be clear beforehand. So, I hope you can sense that in this respect, the frameworks of Mac and Windows are completely different.
It is owing to the limited storage that most smartphones have. The storage can range from 8 GB - 256 GB. Thus, it is not a viable idea to keep a folder for collecting trash from everywhere.
However, specific applications, such as Photos, carry a particular folder called Trash for lately deleted items. Thus, if you would like to eliminate junk files, you have to open each app and remove unwanted data.
Below, we have presented some feasible methods to kick the junk files out from your Android device.
The most straightforward answer to this question is; NO, Trash Folder or Recycle Bin are not present on Android Device. That’s great because this concept has to be clear beforehand. So, I hope you can sense that in this respect, the frameworks of Mac and Windows are completely different.
It is owing to the limited storage that most smartphones have. The storage can range from 8 GB - 256 GB. Thus, it is not a viable idea to keep a folder for collecting trash from everywhere.
However, specific applications, such as Photos, carry a particular folder called Trash for lately deleted items. Thus, if you would like to eliminate junk files, you have to open each app and remove unwanted data.
Below, we have presented some feasible methods to kick the junk files out from your Android device.
 Optimizing your handset is crucial to improve its overall performance. When you purchase a new Android phone, do you expect that this can become slow like a sloth after few months? Not only you but also nobody does that.
Needless to say that, trash memory in different applications on Android could be highly frustrating. It can even be your nightmare as well. To boost your device, you need to delete the unnecessary files, clean the cache of apps and empty the trash folder.
Although as there no such thing called ‘Bin’or ‘Trash’ in Android, you should follow the steps below diligently to understand how to empty trash on android.
Optimizing your handset is crucial to improve its overall performance. When you purchase a new Android phone, do you expect that this can become slow like a sloth after few months? Not only you but also nobody does that.
Needless to say that, trash memory in different applications on Android could be highly frustrating. It can even be your nightmare as well. To boost your device, you need to delete the unnecessary files, clean the cache of apps and empty the trash folder.
Although as there no such thing called ‘Bin’or ‘Trash’ in Android, you should follow the steps below diligently to understand how to empty trash on android.
 This is 2nd most crucial step, which many of us forget to execute correctly. Can you remember the last time when you deleted all your downloaded files? You can’t because you have not done it over a long time.
Let me be obvious over here. Even if you do not use the downloaded files, they can still hold space in your Android’s internal memory. To clean up the storage, you require omitting them permanently from your device.
Simply navigate to the Downloads Folder from File Manager. Then choose the files you do not need to access anymore and hit the Delete option. I bet you will be awestruck to see the amount of storage it would free up.
This is 2nd most crucial step, which many of us forget to execute correctly. Can you remember the last time when you deleted all your downloaded files? You can’t because you have not done it over a long time.
Let me be obvious over here. Even if you do not use the downloaded files, they can still hold space in your Android’s internal memory. To clean up the storage, you require omitting them permanently from your device.
Simply navigate to the Downloads Folder from File Manager. Then choose the files you do not need to access anymore and hit the Delete option. I bet you will be awestruck to see the amount of storage it would free up.
 Do you want to master the methodology of how to empty trash on android? Several applications are that can you can make use of to delete the junk from your device. Why don’t you try these? Let me explain to you the details before that.
We recommend the most simple app to delete junk files from Android. They can access the trash files, thereby managing your phone’s storage. One such efficient application is Phone Cleaner. Install it now to augment your system’s performance.
Do you want to master the methodology of how to empty trash on android? Several applications are that can you can make use of to delete the junk from your device. Why don’t you try these? Let me explain to you the details before that.
We recommend the most simple app to delete junk files from Android. They can access the trash files, thereby managing your phone’s storage. One such efficient application is Phone Cleaner. Install it now to augment your system’s performance.