










-
Refreshing the Guest Room with a fresh coat of paint
-
Updating the Bathroom Shades
-
Add an Emphatic Wall
-
Get Innovative with color hues
-
Paint Festive Striped Walls
-
Install a Convenient Home Elevator



20 Feb 2023

07 Feb 2019

28 Jan 2021

07 Dec 2023


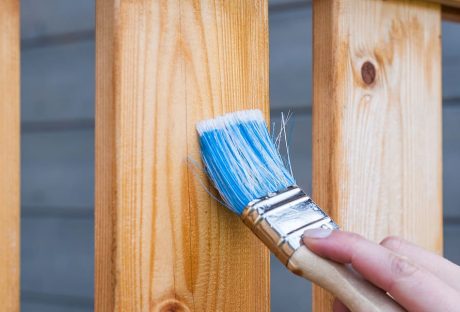
Freshly painted doors can enhance the makeover of any house. You can paint your doors on your own or hire a professional painter to do it for you. Many people prefer painting their doors themselves as they want to enjoy painting them on their own. However, if you don’t have any experience or want high-quality paintwork, you should always hire professionals for complete painting service. If you choose to paint or spray paint your interior doors, you need to know some tips and skills to do the job right. Let us explore some tips by professional painters that you can use to paint your doors. Remove or cover the door handles: Paint can stain the door handles and locks. So, it is better to remove them or cover them with painter’s tape to prevent them from getting stained. You will need a screwdriver with multiple heads to remove the handles and locks. Call a locksmith to remove the inbuilt lock systems as they are difficult to remove. Removing these things will make it easy to clean, sand and then paint the doors. Fill the cracks and holes: If there are any holes or cracks in your doors, you can fill them with a wood filler, gypsum plaster, or a filling compound. Put a small amount of wood filler or filling compound on a putty knife and put it into the hole or crack uniformly. Place it as uniformly as possible and leave it to dry for at least two hours. Check the filling the next day, and it requires more filling, add the required amount of filling compound to fill the space completely. Sand the surfaces: The old paint gets worn and imperfections develop with time on the door surfaces. That is the reason why homeowners want to repaint their doors. Sanding removes the worn paint and imperfections easily and prepares the surfaces for a clean and uniform finish. Start painting with a Roller: If you have already chosen the paint color, mix several cans in a bucket so that you can have the same shade on every door. Sometimes, the shade in different cars can vary a little, although not noticeable in the interiors in low light. Use a 4-inch roller to apply a thin layer of paint on the door starting from an edge. If you want to paint the trim first, you can use a 2-inch brush. To remove any lines, move the lightly loaded brush or roller from bottom to top. Using this technique will help you paint quickly and uniformly while leaving a wet edge. Painting a paneled door: Many homes have paneled doors and the technique to paint them is different from painting a flat door. Paint every panel beginning from the upper left side downwards in a sequence. Always use a brush of appropriate width to paint a paneled door. Don’t worry if you paint a bit outside the edges of a panel. Once the edges are painted, use a small roller to paint the space between the panels. If the rollers of appropriate size are not available, use a 2-to-4-inch brush to paint the center of the panels. Minimize the drying time: Paint in light and uniform coats to minimize the drying time. Thick coats of paint take a bit longer to dry and may look nonuniform after drying. If you are using a brush, you should dip its bristles halfway in the paint and tap the brush against the container edge slightly to remove the excess paint. If you plan to use a roller, place it in a pan and use the back-and-forth strokes to paint uniformly without soaking it. Let the paint dry before installing knobs and locks: Let the paint dry completely before installing the doorknobs and locks. Also, tell your kids and family members not to touch the doors until they dry completely. Once they dry up completely, you can install the accessories and start using the doors as you use them normally. Final Words: Painting the doors is not difficult, even if you are painting them for the first time. All you need to do is to follow the correct sequence of steps, use the right size of tools and prepare the surfaces before grabbing a brush or roller. Following these tips can help you to paint your interior doors easily and conveniently. Read Also: 10 Pro Tips To Minimize Commercial Door Repair & Maintenance Cost All About Commercial Fire Doors Why Should you Consider Security Doors for Your House?
READ MOREDetails
When the summer heat starts kicking in, doesn’t it feel good to jump into the pool? Spending hours in the soothing water, swimming, and having a relaxing time takes all the summer heat away. And if you have a pool in your backyard, you can go swimming anytime you want, right? The only problem is, keeping the pool clean and hygienic to swim. If you are getting inside the water, it’s essential to make sure the water won’t harm your skin or hair. Pool cleaning and maintenance are almost as important as taking a bath every day. The easiest way is to follow a certain procedure and regular practices to keep the water clean. You might also want to buy some cleaning chemicals. While pool cleaning can get a bit costlier, there are some easy-to-use and cheap online pool supplies available to save your day. Here is how you can maintain the pool and enjoy a swim round anytime in a day. Pool Maintenance Basics - Maintaining a pool is a three-step process and is pretty easy once you get used to it. Step 1: Water Circulation As much as the water keeps circulating, the pool is going to stay healthy. The water will carry any invisible dirt and debris towards the filters to keep itself clean and harmless. Ideally, the pool filters and pumps should keep the water running all the time. But considering the electricity situation, that might not be possible. It will be cheaper if you follow a certain timetable to keep the water running. The best solution would be to turn on filters and pumps during the night hours till the morning. A good 8-hour routine would be enough for water circulation. Step 2: Cleaning The Pool and Equipment The circulating water will carry and trap any debris into the pump baskets and filters. To maintain those tools functioning, clean all the pump baskets and filters. You might have sand filters or cartridge filters. Cleaning both the filters is easy and doesn’t need a lot of work. There are some automatic, robotic vacuum cleaners and filters that can do the cleaning themselves so that you can invest in that as well. Now, to clean the pool, first, pick up the skimmer and get all the visible debris out. Then brush and clean the walls, steps, ladders to get rid of any collected dirt that might harm the water. Brushing on alternate days would be a good idea. Cleaning can never be enough, be more generous in this step. Shine the pool and the water. Step 3: Pool Chemistry Pool Chemistry might sound tricky and complex to understand for beginners. But it isn’t. A couple of sanitizers and chemicals are going to help you maintain the pH of the water. Ideally, the pH of the pool water should be between 7.2 to 7.6, and the alkalinity range should be 100-150 ppm. Get some pool test strips to test these ranges and use the chemicals accordingly. Have pool chlorine and dispensers in handy all the time. If you have a saltwater pool, then you can get salt supplies at a cheaper rate online at Watson’s. Test the water every other day to make sure it’s safe to enter. Final Words: Pool cleaning and maintenance activity is actually as fun as swimming. Once you understand and sync into the whole process, it’s quite easy to do it at least once a week. Get into the cleaning mode, and your pool will stay functional for a longer time. Next time you host a party, your pool will be shining with crystal clear water. Read Also: Top 5 Tips in Designing Your Swimming Pool Renting a villa in Malta with a private pool 5 Hotel Housekeeping Tricks You Need To Clean Your Bathroom
READ MOREDetails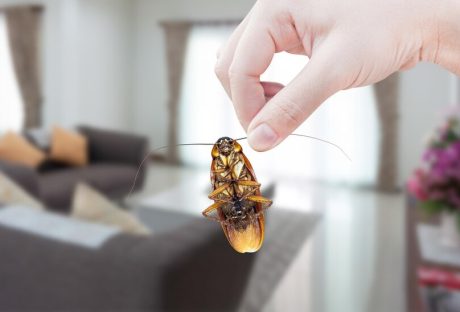
No one wants to come home to a kitchen crawling with critters. Imagine coming home and seeing ants, weevils, cockroaches, and other insects moving amongst your foodstuff and utensils. If that doesn’t make the hairs on your neck stand, we don’t know what will. Not only do these insects carry germs and other harmful substances, but they also have a distinctive odor that lingers even after they leave. Pests can chew through boxes and plastic containers; some can even chew through metal. They can also contaminate food and surfaces, and they leave droppings on drawers and pantries. These pests are a nuisance that most homemakers don't want to encounter because they know how wasteful and problematic they can become. You don’t want to throw away (but you have to) cereals, pasta, and other foodstuffs that have been crawled and nibbled upon by rodents, cockroaches, and other pests, don't you? In this case, you need to look for a reputable pest control company like Top Line Pest Control to ensure there won’t be any pests in your home fast. Here Are Four Prime Steps To Prevent Insects From Taking Over Your Kitchen If you want to keep your home pest-free, here are some things you need to consider. 1. Immediate clean-up Crumbs, leftovers, and spills always attract pests inside the house. It would be best to conduct an immediate clean-up after every meal. Remove leftovers and place them in your recycling bin or trash compactor, place your dishes and utensils in the dishwasher, and wipe down eating surfaces immediately after eating. Doing this will prevent pests from making their way to your kitchen. You can also prevent pests by wiping surfaces and problematic areas with 50% vinegar, dish soap, and water. You can also use a salt and water solution to directly wipe the surface and spray on bugs. 2. Buy and stock food in cans and glass jars When you shop for your groceries, select products that come in cans. Most pests can chew through paper, cardboard boxes, and even thin plastic containers. If you stock the pantry, it will be better to stock cans or glass jars of food because pests rarely chew through these materials. 3. Check on the kitchen pipes Another way to prevent insects from coming into your home is to check the kitchen pipes. If the holes are bigger than the pipes, you have to cover them properly with sealant to prevent mice and other pests from using them as the entryway to your home. You can do it yourself by using caulking agents, glue, or expanding foam to cover such spaces, however, you can ask a pest control company to eliminate insects and pests professionally and safely in the long term. 4. Take out the trash If you don’t have waste disposal in your sink, you must take out the trash regularly. You also have to use top-grade trash bags to keep pests away. Endnotes Keeping pests away from your kitchen can be challenging. However, with a few simple methods, you can ensure your kitchen is as clean as possible. Read Also: How To Choose the Right Brass Range Hood for Your Kitchen Know About The Type Of Kitchens According To Different Size Different Styles of Kitchen Cabinets
READ MOREDetails