










10 Best Trailing Indoor Plants To Buy In 2022

Published on: 10 March 2022 Last Updated on: 17 March 2022
Trailing Indoor Plants

Your dream house needs some ornaments and decorations to stand out as the queen of all houses in your neighborhood. With trailing indoor plants, you can add the green your beautiful home was missing all this time.

For the urban dwellers, it is almost impossible to live inside the greenery. But, using indoor trailing plants, you can bring the green into your house.

Indoor plants are the lively jewelry of your home decoration, and it is no secret. It is only with the green plants that the brick walls and your house's concrete get the touch of life.

Hanging a few vines here and there from the pots can add the touch of the goddess of green vines to your home.

You can keep a trail of the indoor plants on the railing of the staircase. You can hang some of them from the porch ceiling of your house. Maybe you can keep one or two containing some low-light plants for the interior?

As you start to live with the green, you add extra life and vivacity to your life. So now, if I have got you even a little bit interested in the indoor trailing plants, allow me to introduce you to the best trailing indoor plants that you can decorate your house with.

10 Best Trailing Indoor Plants

You can invite the wild indoors with these incredibly pretty green trailing indoor plants mentioned in this article.

1. Trailing Indoor Plants: Golden Pothos

Trailing Indoor Plants Golden Pothos

Golden pothos is just as beautiful as healthy for your surrounding environment. Not only can they thrive in the low light, but they also keep the air around you pure and refreshed.

They help eliminate odors and cleanse the air within your home with formaldehyde, benzene, and carbon monoxide.

If you have to stare at the computer screen all day long, you can look at them to reduce the irritation.

As for decorating the interior, it is one of the most beautiful trailing indoor plants that you can hang from the ceiling of your room or the balcony.

Read More: Grow these flowering plants in your home garden

2. Trailing Indoor Plants: Satin Pothos

Trailing Indoor Plants Satin Pothos

Scindapsus pictus' Exotica' or satin pothos is another vine you can keep within your home. It grows slowly, and the beautiful green leaves are splashed with silver color.

This plant takes only a little water to grow within low light. When 2 cm of the compost goes dry, you can water them. Even NASA recommends these plants for the refinement of indoor air.

The satin pothos are easy to propagate, and they are low maintenance. Many people keep them as good luck charms. If you have a flower vase with a stand in the drawing-room, you can place one of these plants there.

3. Trailing Indoor Plants: String Of Pearls
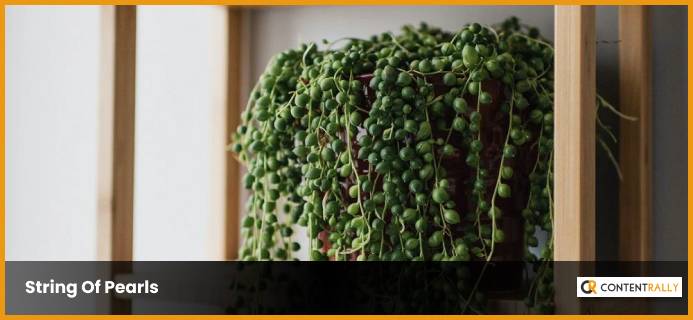
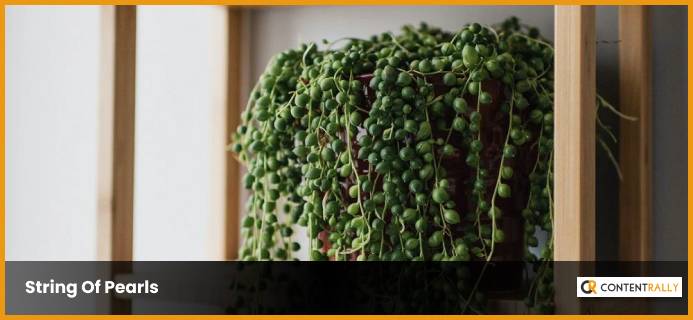
Trailing Indoor Plants String Of Pearls

One of my favorites, Senecio Rowleyanus, or String of pearls, is another pretty member that you can add to your drawing room. The skinny stems of this plant grow green bubbles as if they are green pearls.

During winter, tiny white flowers grow out of the String of pearls plants. These are cascading plants, and they can be the attraction of your home decor.

It is a pretty trailing indoor plant that grows in low light and dry air. I will suggest you make a trail of these indoor green pearls. You can hang them from baskets or use a shelf to arrange a trail of baskets containing the String of pearls.

4. Trailing Indoor Plants: Burro's Trail
Trailing Indoor Plants Burro's Trail

You can easily grow, propagate, and maintain the Burro's trails. However, if you are worried about your children and pets, then allow me to assure you that these trailing indoor plants pose no harm to them.

They are nonpoisonous plants and are easy to grow and maintain. You can lay them on top of a pot full of compost and grow them quickly within a few days' notice. The plant also requires minimal watering. You can water them when the 2 cm of the compost is dry.

You can decorate the interior with a few small baskets of the Burro's tail hanging from the ceiling. Or, you can also keep them on top of the tables in the dining room.

You May Like To Read: 4 Essential Tools Needed to Maintain Your Garden in the Winter

5. Trailing Indoor Plants: Red Herringbone Plant
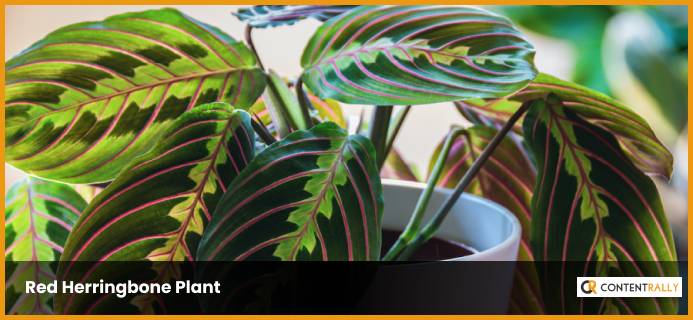
Trailing Indoor Plants Red Herringbone Plant

Maranta leuconeura, Red herringbone plant, also known as the prayer plant, is another beauty to decorate your interior.

The attractive patterns of this plant will amaze you both during the day and at night. Growing this plant may take a little experience. They require only a little water, but you need to water these plants when the pot is dry.

The prayer plant is one of the most common trailing indoor plants, which you can place on the table.

6. Trailing Indoor Plants: String Of Hearts

Trailing Indoor Plants String Of Hearts

Also known as the Chain of hearts, sweet vines, rosary vines, String of hearts is another pretty indoor trailing plant. These are easy to grow and propagate.

They have tiny leaves with pink and purple shades, making your interior look prettier as they grow and thrive across your balcony. In addition, they create the best contrastive combination with a white wall or ceiling.

If you are a beginner and not much of a career giver, the String of hearts will bear with you. This plant grows within low light and requires minimum water.

7. Trailing Indoor Plants: Boston Fern
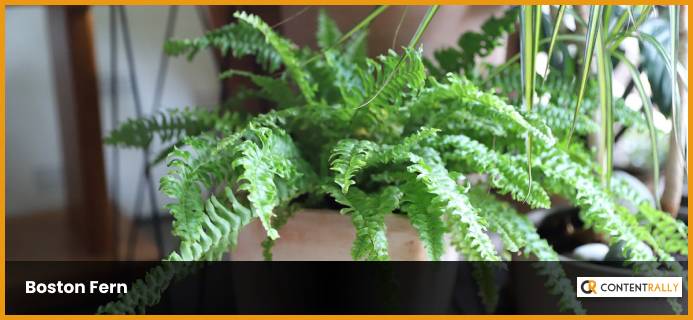
Trailing Indoor Plants Boston Fern

Do you want to keep a vase full of green and lively ferns on the tea table? If your need is something similar, you can consider giving the Boston ferns someplace within your house.

You can hang them from the ceiling or shelves. But unlike the other plants here, they are attention seekers. They need your daily care; from ample lights, humidity and regular watering are a must.

Do you have space beside your window? If you do, you can put them there. They shed dead leaves, so you also need to groom them occasionally. They are also excellent givers. And they keep the interior air fresh and maintain the moisture within the house.

8. Trailing Indoor Plants: Chain Of Cactus
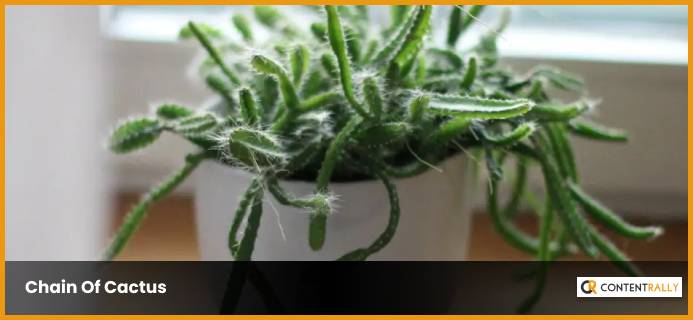
Trailing Indoor Plants Chain Of Cactus

Rhipsalis paradoxa minor, or the Chain of cactus, grows pretty-looking white flowers during the spring. However, the winter stimulates the growth of these pretty flowers. These trailing interior plants are rich in antioxidants and vitamin C.

These are best for big hanging pots. You can keep a wide vase full of the Chain of cactus and let them grow wildly. They require minimum water and light, although you need to be a little experienced to grow them properly.

You May Also Like This: Best Material for Garden Sheds: A Guide for Everyone

9. Trailing Indoor Plants: Grape Ivy

Trailing Indoor Plants Grape Ivy

These trailing indoor plants are pretty underrated. The grape ivy is a good air purifier; they require moderate or low light to thrive within your interior. They also have antioxidant and anti-inflammatory benefits.

You can hang one or two baskets of the grape ivy inside and be amazed as they keep shining while getting older.

10. Trailing Indoor Plants: Maidenhair Fern
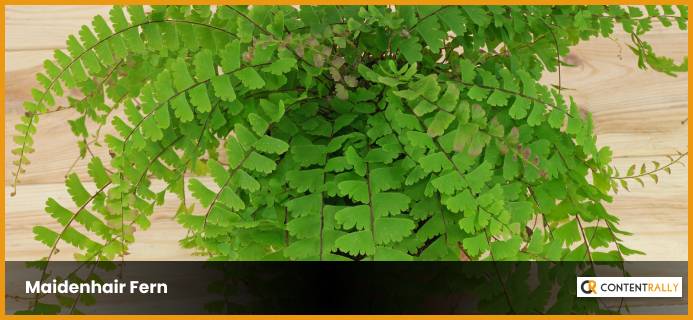
Trailing Indoor Plants Maidenhair Fern

The cousin of the Boston ferns, not too distant from its relative, the maidenhair ferns take after the qualities of the Boston ferns. They also require lots of care, ample light, and regular watering.

They indeed maintain the various hues of greenkeeping a dazzling look within the interior of your house.

These trailing indoor plants possess anti-thyroidal, anti-diabetic, antifungal, wound healing, and anti-hair loss properties. So not only are they pretty, but they are quite beneficial for your health as well.

Let The Trailing Indoor Plants Decorate Your Home

Most of these plants only take a little care and light to grow healthy within the interior of your house. You can go from little pots of green plants to large vases full of them to decorate your interior wildly. These plants have some health benefits like refreshing the interior air or cleansing it. They are also good at keeping the air humid.

If you are looking for such plants, I suggest you choose from any of these vines, pothos, cactuses, and ferns. Also, if you think that we have missed out on any valuable plant, you can let us know through the comment.

Read Also:

  1. Garden Edging for Beginners
  2. How To Arrive At The Perfect Choice Of A Potting Bench For Your Gardening
  3. How To Install Artificial Grass In Your Garden – Installation Guide Step By Step

Shahnawaz is a passionate and professional Content writer. He loves to read, write, draw and share his knowledge in different niches like Technology, Cryptocurrency, Travel,Social Media, Social Media Marketing, and Healthcare.

View all posts

Leave a Reply

Your email address will not be published. Required fields are marked *

Related

Kitchen Remodeling

NY Kitchen Remodeling Transforming Your Space With Style

In the heart of every home, the kitchen stands as a hub of activity. It's where culinary masterpieces are born, where families gather, and where memories are created. But what if your kitchen is no longer inspiring or functional? That's where the magic of "ny kitchen remodeling" comes into play. In this article, we'll explore the exciting world of kitchen remodeling in New York, guiding you through the process, trends, and tips to transform your kitchen into a stylish and functional space. Understanding the Need for Kitchen Remodeling Kitchen remodeling is the need of the hour, and you must understand it for convenience. Here, we discuss some points that will provide you with an idea of kitchen remodeling.  Assessing the Current State of Your Kitchen Before diving into the renovation process, it's essential to assess your existing kitchen's layout, design, and functionality. Identify what works and what doesn't. Take note of any outdated appliances, worn-out cabinets, or inefficient use of space. Setting Clear Goals for Your Remodel Once you've identified the shortcomings, set clear objectives for your kitchen remodeling project. Do you want to enhance storage space, improve the flow, or create a more modern aesthetic? Having a clear vision will guide your decisions throughout the process. Exploring Design Trends When you look for kitchen design, the first thing you look into is aesthetics. This section discusses some of the trends in the new kitchen's design. The design of the modern kitchen must sync with the present requirements. So let us understand them all here. Modern Minimalism Minimalistic designs with clean lines, neutral colors, and streamlined appliances are gaining popularity in New York kitchens. This trend emphasizes functionality and simplicity, making the kitchen a serene space for cooking and socializing. Open Concept Layouts Breaking down walls to create an open-concept kitchen and living area is another prevalent trend. This approach fosters a sense of togetherness, making it easier to interact with family and friends while preparing meals. The open layout can easily fit today's requirements, and at the same time, they elevate the aesthetics and the utility of modern kitchens.  Sustainable Kitchen Remodeling Eco-friendly designs and materials are on the rise. Incorporating energy-efficient appliances, recycled materials, and sustainable practices not only reduces your carbon footprint but also adds value to your home. Sustainability is the need of the hour. Here, we discuss some of the approaches to earn it. Let us get started with the discussion here.  The Kitchen Remodeling Process Here we bring forth some areas of kitchen remodelling. Budgeting Setting a realistic budget is a crucial step. Determine how much you're willing to invest in your project, and allocate funds for each aspect, from cabinetry and countertops to lighting and flooring. Hiring Professionals Engaging experienced contractors, designers, and craftsmen is vital. They can help you bring your vision to life and ensure that the remodeling process goes smoothly. Choosing Materials Selecting the right materials is key to achieving the desired look and durability. Explore options for countertops, cabinets, backsplashes, and flooring that match your style and budget. Adding Personal Touches Personalize your kitchen by incorporating elements that reflect your personality and preferences. Whether it's unique lighting fixtures, custom cabinetry, or a bold color scheme, these touches will make your kitchen truly yours. Benefits of Kitchen Remodeling There are some of the benefits of kitchen remodeling. Some people might relate it to aesthetics. But if you discuss it in the long run, it indeed has its benefits for not one but multiple reasons. Let us look at them here.  Enhanced Functionality A well-planned kitchen remodel can significantly improve the functionality of your space, making cooking and daily tasks more efficient. Storage In the UK, space is depleting; therefore, everyone within their capacity is trying their level best to enhance the storage facility. A kitchen removal focuses on using the space and creating new space.  It indeed has its own advantages. Therefore you can say that storage indeed becomes one of the factors. With a good storage facility, you can remodel your kitchen and make it smart.  Increased Home Value Investing in a kitchen remodel can increase your home's resale value, making it a wise financial decision. Improved Aesthetics Aesthetic upgrades can transform your kitchen into a visually stunning space, providing joy and inspiration daily. Safety  The majority of kitchen accidents occur due to safety reasons. If your oven is outdated, If the screws of your cupboard fittings are not ready, it can indeed put you at risk. A kitchen remodel provides you with an opportunity to replace whatever is old. Thus, it reduces the risks. This is the reason people try to move whatever is old for safety reasons.  Adding personal Touches There is nothing better than personalization. Personalizing your kitchen is all about the efforts that you made in decking and improving the features it has. There are myriads of areas in your kitchen where you have room for personalization. You can try different ways to personalize your kitchen.  First, you can create a noticeboard corner in your kitchen. You can leave comments or directions there for the other family members. You can also use the potted plants on the window sill. Thereafter, you can create a pegboard so tha you can access the utensils you use most frequently.  Conclusion To conclude, one can say that kitchen remodeling must be one of the projects that a household must prioritize.  In the bustling city of New York, kitchen remodeling is more than just a renovation project; it's a way to enhance your daily life. By embracing the latest design trends, carefully planning the process, and personalizing your space, you can create a kitchen that reflects your style and meets your needs. Read Also: Simple Ways To Prevent Insects From Taking Over Your Kitchen How To Choose the Right Brass Range Hood for Your Kitchen Five Essential Components For Your Outdoor Kitchen

READ MOREDetails
Farming

Eco-Friendly Farming: How Organic Fertilizers Nurture Healthy Soil

With organic fertilizers, you can make the earth stronger and healthier than any other method. They are good for the earth because they don't hurt it much and let plants grow naturally. This piece has a lot of information about how organic fertilizers can help soil stay healthy. What Are Organic Fertilizers? These natural materials from plants or animals help your plants grow better. They've got the good stuff like nitrogen, phosphorus, and potassium that plants love. People like them because they're eco-friendly and don't harm the environment. How Do Organic Fertilizers Work? Organic fertilizers are natural plant nutrients that enrich the soil and provide essential elements for healthy plant growth. They release nutrients slowly, feeding plants over time and improving soil structure. This gradual release helps prevent nutrient runoff and ensures plants receive a balanced diet for optimal development. One key advantage of organic fertilizers is their eco-friendly nature. Since they're made from organic matter, they promote soil health by fostering beneficial microorganisms and earthworms. These tiny soil allies aid in nutrient absorption, making it easier for plants to access the necessary nourishment.  Organic fertilizers also contribute to long-term soil fertility, reducing the need for frequent applications and potentially harmful chemicals. Organic Fertilizers Vs. Chemical Fertilizers They have a friendly, Earth-loving vibe. In contrast, chemical fertilizers are made in a lab, which sounds more scientific. In terms of effectiveness, both types can make your plants happy, but they differ in how they do it.  Organic fertilizers release nutrients slowly and improve soil structure over time, like a gradual health boost. Chemical fertilizers, on the other hand, provide a quick nutrient fix, like giving your plants a shot of an energy drink. Now, let's talk eco-friendliness. Organic fertilizers are environmentally kind, enriching the soil and reducing the risk of chemical runoff into waterways. Chemical fertilizers can sometimes be harsh on the environment, as they may lead to pollution if not used carefully. Organic fertilizers are the "green" choice, slow and steady, while chemical fertilizers are the quick fix, but be cautious about potential downsides like environmental impact and short-term results. The Different Types Of Organic Fertilizers Organic fertilizers come from a variety of natural sources. These include the following: Compost Compost is a fantastic organic fertiliser from decomposed organic matter like kitchen scraps, leaves, and yard waste. It's rich in nutrients and improves soil structure, making it easier for plants to access vital elements. Composting at home is an eco-friendly way to recycle kitchen waste and create nutrient-rich soil additives for your garden. Manure Manure, typically from animals like cows, horses, or chickens, is an excellent source of organic nutrients. It's widely used in farming and gardening to enrich the soil with essential elements such as nitrogen, phosphorus, and potassium. Just make sure to compost or age manure before applying it to your garden to avoid potential issues with odor and pathogens. Bone Meal Bone meal come from grounded animal bones. It's an excellent source of phosphorus, which promotes root development and flowering in plants. Gardeners often use bone meal for bulbs, roses, and other flowering plants to encourage healthy growth and vibrant blooms. Fish Emulsion Fish emulsion is a liquid organic fertilizer derived from fish byproducts. It's rich in nitrogen and provides a quick nutrient boost to plants. It's easy to apply but be prepared for the fishy smell. Dilute it before use to reduce the odor and prevent burning your plants. Seaweed and Kelp Seaweed and kelp-based fertilizers are eco-friendly options that offer a wide range of nutrients, including trace minerals. They improve soil structure and enhance plant resistance to stress. These organic fertilizers are especially beneficial for vegetables and fruits. Blood Meal A blood meal is a high-nitrogen organic fertilizer made from dried animal blood. It's a potent nitrogen source, making it ideal for plants that require rapid growth. Be cautious not to overapply, as it can be strong and potentially harm plants if used excessively. Coffee Grounds Coffee grounds are an easily accessible organic fertilizer for your garden. They add nitrogen to the soil and help improve its water retention capacity. If you're a coffee lover, consider recycling your used coffee grounds to nourish your plants. Worm Castings Also known as vermicompost, are nutrient-rich excretions of earthworms. They enhance soil fertility and microbial activity while providing a slow-release source of nutrients to plants. Worm castings are gentle on plants and are often used for seedlings and potted plants. Green Manure Green manure crops are grown and then tilled back into the soil. In this way, they improve the structure and fertility of the soil by enriching it with organic matter and nutrients. Green manure is an excellent way to prepare your garden for future plantings while reducing the need for synthetic fertilizers. Eggshells Crushed eggshells are a natural source of calcium and can help prevent calcium deficiency in tomatoes and other plants. They also deter certain pests like snails and slugs. Save your eggshells, crush them, and sprinkle them around your garden to boost your plants' calcium. Benefits of organic fertilizers Aside from its eco-friendly nature, organic fertilizers offer numerous advantages for every farmer or gardener. These are the key benefits of using organic fertilizers: Nutrient-Rich Soil Organic fertilizers enrich the soil with various nutrients. This helps promote healthier plant growth. Improved Soil Structure Organic fertilizers enhance soil structure. This makes it better at retaining water and preventing erosion. Enhanced Microbial Activity Adding organic fertilizers to the soil promotes beneficial microorganisms. The soil is then able to absorb nutrients better. Healthier Plants Plants nourished with organic fertilizers often exhibit better resistance to pests and diseases. This contributes to the overall health of your farm or garden. Choose organic! Organic fertilizer is a green choice for promoting lush plants and nurturing the soil. It offers many great perks, making it a smart choice for the long haul. Choosing organic fertilizer ensures not just tasty produce but also those grown healthily! Read Also: From Dreams To Reality: A Comprehensive Beginner’s Guide On How To Buy A Farm A Viable Alternative to Wild Fish: Can Salmon Farming Be Sustainable? Here Are a Few Reasons Why You Should Use Real Estate Farming Postcards to Increase Visibility of Your Business

READ MOREDetails
how to harvest basil

Everything You Need To Know About Harvesting Basil!

Basil is one of the most popular and versatile herbs you can grow in your garden or indoors. It has a fresh and aromatic flavor that can enhance any dish, from salads and soups to pizzas and pastas. Basil is also rich in vitamins, minerals, and antioxidants just like cilantro. It can benefit your health and well-being. But how do you harvest basil properly so that it keeps growing and producing more leaves?   If these are some of the things you want to know, I have you covered! In this article, I will answer all these questions and more and give you everything you need to know about harvesting basil! So, keep on reading this blog till the end to learn more…  How to Harvest Basil Leaves? The first thing you need to know about harvesting basil is when to do it. The best time to harvest basil leaves is in the morning when the plant is still fresh and moist. Avoid harvesting basil in the afternoon or evening when the plant is dry and wilted. Also, avoid harvesting basil when it is raining or wet, as this can cause the leaves to rot or mold. Steps to Harvest Basil Leaves To harvest basil leaves, you will need a pair of scissors or a sharp knife and a basket or a bowl to collect the leaves. You can also use your fingers to pinch off the leaves, but be careful not to damage the stem or the plant. Here are the steps to follow: Start from the top of the plant, and look for the stems with leaf clusters. These are called the terminal buds, and they are where the basil flowers will grow. You want to remove these buds, as they will make the plant stop producing new leaves and focus on flowering and seeding. This will reduce the flavor and quality of the basil leaves. Cut or pinch off the stem just below the terminal bud, leaving about a quarter of an inch of stem above the next pair of leaves. This will encourage the plant to grow two new stems from the leaf nodes and produce more leaves. You can also cut or pinch off any other stems that are too long or leggy and leave about four to six pairs of leaves on each stem. Repeat this process for all the stems that have terminal buds, and collect the leaves in your basket or bowl. You can also harvest some of the lower leaves but leave enough leaves on the plant to allow it to photosynthesize and grow. You should not harvest more than a third of the plant at a time, as this can stress the plant and reduce its growth and health. After harvesting, rinse the leaves with water and pat them dry with a paper towel. You can use them fresh or store them for later use. How to Harvest Basil So It Keeps Growing One of the benefits of harvesting basil is that it stimulates the plant to grow more leaves and branches and prevents it from flowering and seeding. However, you need to harvest basil regularly and correctly, so that it keeps growing and producing more leaves. Here are some tips to follow. For instance, you must harvest basil: At least once every two weeks, or more often if you see the terminal buds forming. This will keep the plant bushy and compact and prevent it from becoming woody and bitter. From different parts of the plant, and not always from the same spot. This will ensure that the plant grows evenly and does not become lopsided or uneven. Before it flowers. This is because the flowers will reduce the flavor and quality of the leaves. If you see any flowers forming, remove them as soon as possible. You can also pinch off the flowers and use them as edible garnishes or decorations, as they have a mild and sweet flavor. Before the frost, as the cold weather will kill the plant. You can either harvest the whole plant and store it for later use, or bring it indoors and keep it in a sunny and warm spot. You can also propagate the plant by taking cuttings and rooting them in water or soil and grow new plants for the next season. How to Harvest Basil Without Killing The Plant? Harvesting basil is different from harvesting lettuce or other plants. The process is good for the plant and you, as you can enjoy the fresh and aromatic leaves in your dishes. However, you need to be careful not to harvest too much or too often, as this can harm and kill the plant. Here are some dos and don'ts of harvesting basil without killing it: Do harvest basil from the top of the plant, not the bottom or the middle. This will allow the plant to grow stems and leaves from the lower nodes and maintain its shape and structure. Don't harvest basil from the main stem or cut it too close to the ground. This will damage the plant and prevent it from growing new stems and leaves. Leave at least four to six pairs of leaves on each stem and about an inch of stem above the ground. Do harvest basil gently and carefully, and not roughly or forcefully. This will avoid injuring the plant and exposing it to diseases or pests. Use a sharp and clean tool, such as scissors or a knife, and make clean and smooth cuts. You can also use your fingers to pinch off the leaves but be gentle and precise. Don't harvest basil when it is stressed or unhealthy, such as when it is wilting, yellowing, or diseased. This will weaken the plant and make it more susceptible to further damage. Wait until the plant recovers and looks healthy and green before harvesting. You can also water and fertilize the plant to help it grow and thrive. Do harvest basil when it is young and tender, not old and tough. This will ensure the leaves are fresh, flavorful, and not bitter or woody. Harvest basil when the leaves are about two to three inches long before they curl or turn brown. How to Pick Basil Leaves? Picking basil leaves is another way to harvest and use the leaves in your dishes. You can pick basil leaves with your fingers or with a pair of tweezers, depending on your preference and convenience. Here are some tips on how to pick basil leaves. For instance, you can pick it: From the top of the plant, not the bottom or the middle. This will allow the plant to grow stems and leaves from the lower nodes and maintain its shape and structure. From the stems that have terminal buds, not from those that have none. This will prevent the plant from flowering and seeding and producing more leaves. You can also pick some of the lower leaves but leave enough leaves on the plant to allow it to photosynthesize and grow. Gently and carefully, and not roughly or forcefully. This will avoid injuring the plant and exposing it to diseases or pests. Use your fingers to pinch off the leaves or a pair of tweezers to pluck them off. Be gentle and precise, and do not pull or tug on the leaves or the stems. When they are young and tender and not when they are old and tough, this will ensure the leaves are fresh, flavorful, and not bitter or woody. Pick basil when the leaves are about two to three inches long before they curl or turn brown. How to Store Basil Leaves? Storing basil leaves is a great way to preserve and enjoy them for later use. You can store basil leaves in different ways, depending on how long you want to keep them and how you want to use them. Here are some of the best ways to store basil leaves: Refrigerate Them You can refrigerate basil leaves for up to a week, by wrapping them in a damp paper towel and placing them in a resealable plastic bag or an airtight container. This will keep them moist and fresh, and prevent them from wilting or drying out. However, you should not wash them. Freeze Them You can freeze basil leaves for up to six months, by blanching them in boiling water for a few seconds, and then plunging them in ice water to stop the cooking process. This will preserve their color and flavor, and prevent them from browning or oxidizing. Then, pat them dry with a paper towel, and place them in a resealable plastic bag or an airtight container. You can also chop them and mix them with some olive oil, and freeze them in ice cube trays. This will make it easier to use them in soups, sauces, or dressings. Dry Them You can dry basil leaves for up to a year, by hanging them upside down in a warm and dry place, such as a closet or a pantry. This will dehydrate them and concentrate their flavor, and make them last longer. However, you should avoid drying them in direct sunlight, as this can bleach them and reduce their quality. You can also dry them in an oven or a microwave, but be careful not to burn them or overcook them. Once they are dry, you can store them in a glass jar or a spice container, and crush them or grind them before using them. Make Pesto You can make pesto with basil leaves, by blending them with some garlic, pine nuts, parmesan cheese, and olive oil. This will create a delicious and versatile sauce that you can use for pasta, sandwiches, salads, or dips. You can store pesto in the refrigerator for up to a week, or in the freezer for up to six months. You can also customize pesto by adding other herbs, nuts, cheeses, or spices, according to your taste and preference. How to Cut Basil? Cutting basil is a simple and easy way to harvest and use the leaves in your dishes. You can cut basil with scissors, a knife, or your fingers, depending on your preference and convenience. Here are some tips on how to cut basil: Wash and dry the basil leaves before cutting them to remove any dirt or insects. You can rinse them under running water or soak them in a water bowl with a few drops of vinegar. Then, pat them dry with a paper towel or spin them in a salad spinner. Cut the basil leaves just before using them, to preserve their flavor and aroma. If you cut them too early, they will lose their freshness and wilt. You can also bruise or damage the leaves if you cut them too roughly or with a dull tool. Cut the basil leaves according to the size and shape that you need for your recipe. You can either leave them whole or chop them finely or coarsely. You can also cut them into ribbons or strips, by stacking several leaves together, rolling them up, and slicing them thinly. This is called the chiffonade technique, and it creates a beautiful and elegant garnish. Cut the basil leaves with a sharp and clean tool, such as scissors or a knife, and not with a blender or a food processor. This will avoid bruising or crushing the leaves and releasing their oils and juices. You can also use your fingers to tear or pinch off the leaves but be gentle and careful. How to Use Basil Leaves? Using basil leaves is a fun and easy way to add flavor and aroma to your dishes. You can use basil leaves in different ways, depending on your mood and occasion. Here are some of the best ways to use basil leaves: Fresh You can use fresh basil leaves to garnish and enhance your dishes, such as salads, soups, pizzas, and pastas. Also you can use fresh basil leaves to make salads, such as caprese salad with tomatoes, mozzarella cheese, and basil, or Greek salad with cucumbers, feta cheese, and basil. You can also use fresh basil leaves to make drinks, such as lemonade, tea, or cocktails, with basil, lemon, sugar, and water. Cooked You can use cooked basil leaves to flavor and season your dishes, such as sauces, stews, curries, and casseroles. Also you can use cooked basil leaves to make dishes, such as tomato sauce with basil, garlic, and onion, or chicken with basil, cream, and mushrooms. You can also use cooked basil leaves to make breads, such as focaccia with basil, olive oil, and salt, or muffins with basil, cheese, and eggs. Preserved You can use preserved basil leaves to store and enjoy them for later use, such as freezing, drying, or making pesto. Also you can use preserved basil leaves to make dishes, such as pesto pasta with basil, garlic, pine nuts, and parmesan cheese, or roasted vegetables with basil, olive oil, and salt. You can also use preserved basil leaves to make snacks, such as crackers with basil, cheese, and honey, or popcorn with basil, butter, and salt. Wrapping It Up! Basil is a wonderful herb that you can grow and harvest in your garden or indoors. It has a fresh and aromatic flavor that can enhance any dish, and a rich and nutritious profile that can benefit your health and well-being. By following the tips and tricks in this article, you can learn how to harvest basil properly, so that it keeps growing and producing more leaves, how to cut basil, pick basil leaves, and store them for later use, and how to use basil leaves in different and delicious ways. Read Also: Some Facts You Need to Know About Rainwater Harvesting Asparagus 101: When, How, And How Often To Harvest? Exploring Ideas For A Biophilic Home Design

READ MOREDetails