Published on: 17 August 2021
Last Updated on: 10 January 2025
Cabinets are considered to be the foundation of the kitchen. Besides lying under budget-oriented kitchen designing ideas, they play a very important role in storing the items such as storage of food, equipment required for cooking, etc.
Cabinets are built to store items safely and to provide more spacing and a better look in kitchens of any type according to size. Now, selecting different types of Kitchen cabinets might be a challenging task.
Decades ago, the place where the stove and some utensils were kept had been given the name of the kitchen, but with the change of time and thinking of people and the advancement in technologies, kitchen has been considered the warmth beauty of the house.
5 Types Of Kitchen Cabinets
To reduce your time and effort, we have listed the top 5 types of kitchen cabinets that will be useful for you in the long run.
Base Cabinets consist of adjustable legs and adjustable shelves with shelf support to meet all the storage needs required by a customer.
Moreover, base cabinets come in various sizes. You can choose the size according to the dimensions required for your storage need. They can be easily cleaned.
Wall Cabinets:
Wall cabinets or, wall-mounted cabinets are often marked under amazing kitchen(specifically small ones) storage ideas. They are similar to base cabinets and are supplied with adjustable shelf supports to provide the best symmetrical look. People generally prefer to install wall cabinets in their kitchen to have a modern, sleek look.
They come in various forms slimline wall cabinets, overhead wall cabinets. They are typically built with plywoods(make sure to choose the right kitchen cabinet material of your choice).
Pantry Cabinets:
Pantry Cabinets are considered to provide a great space to provide a better look to your kitchen and also offer a breeze in assembling.
Pantry Cabinets come in the perfect size and can be properly easily installed in the kitchen. They are considered to be the most preferred cabinets because they provide a proper workspace to work in the kitchen.
Combination Cabinets:
Combination cabinets consist of pantry cabinets and base cabinets combination. Thus, this combination offers more space for storing the items safely.
They also cover less space and are easy to install. They have an open top for displaying ornaments. Thus, this is one of the best types of kitchen cabinets that you should prefer.
Appliance Cabinets:
Appliance Cabinets provide a compact way to showcase your held dear kitchen appliances. They are purposely built for ovens and range hoods to provide sufficient space to store such large items. They can be customized according to your requirements.
Cabinets are build up and processed in a systematic manner with proper frames and doors. Cabinets can be easily purchased from specialty retailers, shops for kitchen remodelers, home centers, online retailers, and ready-to-assemble furniture manufacturers.
The Final Thoughts
Some installers also offer a package deal from measurement to construction, to proper installation of cabinets. Also, you can refer to kitchen designers for the best advice on the installation of cabinets. Cabinet doors panels along with refulgent decorative lighting and ideal Feng Shui appearanceswill be stand out inch-perfect on cabinet sides, where exposed, for a more finished appearance. Hence, if you come across any doubts, you can mention them in the comment section below!
Content Rally wrapped around an online publication where you can publish your own intellectuals. It is a publishing platform designed to make great stories by content creators. This is your era, your place to be online. So come forward share your views, thoughts and ideas via Content Rally.
If you're on the hunt for the perfect tiles to adorn your living space, you're in for a treat. Tile stores offer a wide range of options, from sleek and modern to rustic and traditional. In this article, we'll dive deep into the world of tile stores, exploring everything from types of tiles to tips for a successful tile shopping experience.
Tiles are versatile and can transform any space with their elegance and functionality. Whether you're remodeling your kitchen, or bathroom, or looking to add some flair to your floors, finding the right tiles is crucial. In this comprehensive guide, we'll walk you through the exciting world of tile stores in barrie, helping you make informed decisions and turn your design dreams into reality.
Types of Tiles
Whenever we walk into a room, the first thing that we notice is the decor. Tiles are a big part of a room’s decor, and they certainly amp up the overall appeal. If you are thinking of renovating your old house or constructing a new one, consider getting any of these tiles:
Ceramic Tiles
Ceramic tiles are a popular choice due to their affordability and variety. They come in various colors, sizes, and patterns, making them suitable for both traditional and contemporary designs.
Porcelain Tiles
Porcelain tiles are known for their durability and low maintenance. They are ideal for high-traffic areas and outdoor use, making them a versatile option for homeowners.
Natural Stone Tiles
Natural stone tiles, such as marble and granite, exude elegance and luxury. They add a timeless charm to any space but require more maintenance to preserve their beauty.
Glass Tiles
Glass tiles are perfect for creating a modern and vibrant atmosphere. They are commonly used in kitchen backsplashes and bathroom accents, adding a touch of sophistication.
Choosing the Right Tile
How to know which tile suits your room the best? Simple; just get a quick check. Most online and offline tile stores today offer free design analysis with the help of AI. Just click a picture of your space, throw in a tile of your choice, and see the results. Here are a few additional tips that will help you select the right tile:
Consider Your Space
Before heading to a tile store, assess the area where you intend to install the tiles. Factors like moisture levels, foot traffic, and the room's style will influence your choice.
Durability and Maintenance
Consider the maintenance requirements of your chosen tile. Some tiles are easy to clean, while others may require more attention to keep them looking their best.
Aesthetics and Style
Tiles come in various colors, shapes, and patterns. Think about the overall aesthetics of your space and choose tiles that complement your design vision.
Where to Find Tile Stores?
Ahh, here comes the most important question. Where to look for optimum stores that have quality tiles for sale. If you are fortunate enough, you might get a local shop nearby. Otherwise, you might have to look online or travel a bit far.
Local Retailers
Local tile stores provide a hands-on shopping experience, allowing you to see and touch the tiles. They often have knowledgeable staff to guide you through your choices.
Online Retailers
Online tile stores offer convenience and a vast selection. Be sure to request samples if you choose to shop online to ensure the color and texture meet your expectations.
Visiting a Tile Store
Nobody wants to visit a store and then become clueless about why they are even here. Make sure that doesn’t happen to you. Hence, visit a tile store only after you are done considering the following things:
Setting a Budget
Determine your budget before you visit a tile store. Knowing your spending limits will help you narrow down your options and prevent overspending. Without a dedicated budget, things at the tile store might get a bit complex for you!
Bringing Samples and Measurements
If you have existing colors or materials in your space, bring samples to match the tiles. Additionally, measure the area accurately to purchase the right quantity.
Asking Questions
Don't hesitate to ask the store staff for assistance. They can provide valuable insights, recommend suitable tiles, and address any concerns you may have.
The Art of Tile Installation
The journey doesn't end with selecting the perfect tiles. The installation process plays a vital role in the overall outcome. You can choose to DIY or hire professionals, depending on your comfort level and the complexity of the project.
Maintenance and Cleaning
Keeping your tiles in pristine condition is essential for longevity. Learn how to maintain and clean your tiles, ensuring they retain their beauty for years to come.
Innovations in Tile Design
Discover the latest trends in tile design, from digital printing technology that creates intricate patterns to eco-friendly options that align with sustainability goals.
Enhancing Your Home with Tiles
Explore how tiles can enhance various areas of your home, from kitchen backsplashes that make a statement to bathroom designs that exude luxury.
Customization and Personalization
Consider the possibilities of customizing your tiles to add a personal touch to your space. From unique patterns to personalized mosaics, the options are limitless.
Budget-Friendly Tile Shopping
If you're on a budget, don't worry! We've got tips on finding affordable tiles without compromising on quality.
Tile Trends And Caring
Stay updated with the latest tile trends, such as geometric patterns, large format tiles, and the fusion of different materials. Learn expert tips on caring for your tiles and dealing with common issues like stains and grout discoloration.
Concluding Words
Summing it up, tile stores are a haven for those looking to transform their living spaces. From choosing the right type of tile to mastering the art of installation and maintenance, this guide has covered it all.
Now, you’re equipped with the knowledge needed to embark on your tile shopping journey with confidence. So, what are you waiting for? Save this article so that you only bring what’s best for your abode!
Read Also:
The Versatility Of Cream-Colored Rugs: A Must-Have Addition To Any Home Decor
How To Downsize Your Home For Retirement
Lift Your Home Cooking: Mysteries From HMD Bar And Grill’s Kitchen
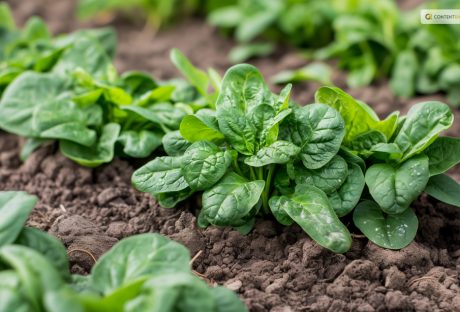
Being a gardener, I know Spinach is one of the most popular and versatile leafy greens you can grow in your garden. It's rich in vitamins, minerals, antioxidants, and fiber and can be used in salads, soups, smoothies, and more. But how do you harvest spinach the right way so that you can enjoy it fresh and crisp and make it last longer?
In this article, I will show you how to harvest spinach, so it keeps growing. I will also explain how to harvest spinach seeds, how to store and freeze spinach, and the health benefits of spinach. Additionally, I will also share some tips and tricks on how to grow spinach successfully and how to use it in delicious recipes.
Whether you're a beginner or an expert gardener, this guide will help you make the most of your spinach harvest. So, keep on reading till the end to learn more, and thank me later!
Driven by Benefits: Why are People Growing Spinach?
Spinach is not only tasty but also healthy. It's low in calories and high in fiber, vitamins, minerals, antioxidants, and phytochemicals. It can help improve various aspects of health, such as:
Eye Health
Spinach is rich in lutein and zeaxanthin. These are carotenoids that protect the eyes from age-related macular degeneration, cataracts, and glaucoma. Spinach also contains vitamin A, which is essential for vision and eye health.
Blood Pressure
Spinach is high in potassium, magnesium, and nitrates, which are compounds that help lower blood pressure and relax the blood vessels. Spinach also contains folate. This helps prevent homocysteine, an amino acid that can damage the blood vessels and increase the risk of cardiovascular diseases.
Bone Health
Spinach is a good source of calcium, magnesium, and vitamin K, which are important for bone health and density. Spinach also contains vitamin C, which helps the body absorb calcium and produce collagen, a protein that strengthens the bones and connective tissues.
Immune System
Spinach is loaded with vitamin C, which is a powerful antioxidant that boosts the immune system and fights off infections and inflammation. Spinach also contains vitamin E, which enhances the immune response and protects the cells from oxidative stress.
Digestion
Spinach is high in fiber, which helps regulate digestion and prevent constipation, diarrhea, and bloating. Fiber also feeds the beneficial bacteria in the gut. This improves the digestion and absorption of nutrients. It also supports the immune system.
Skin And Hair
Spinach is rich in vitamins A, C, E, and iron, which are essential for healthy skin and hair. Vitamin A helps maintain the moisture and elasticity of the skin and prevents acne and wrinkles. Vitamin C helps produce collagen, which keeps the skin firm and smooth.
On the other hand, vitamin E helps protect the skin from sun damage and aging. Iron helps deliver oxygen to the skin and hair cells and prevents anemia, which can cause hair loss and pale skin.
How To Harvest Spinach So It Keeps Growing
One of the best things about spinach is that it's a cut-and-come-again crop. This means you can harvest it multiple times throughout the season if you do it correctly. Here are the steps to follow to harvest spinach so it keeps growing:
Choose the right time to harvest
The best time to harvest spinach is when the leaves are young and tender. This is usually about 40 to 50 days after planting. You can also harvest baby spinach leaves earlier, about 25 to 30 days after planting.
You should harvest spinach before it starts to bolt. This is when it produces flowers and seeds and becomes bitter and tough. Spinach usually bolts when the days get longer and warmer. So, you should harvest it more frequently in the spring and summer.
Use a sharp knife or scissors to cut the leaves
You can either cut the whole plant at the base, leaving about an inch of stem, or cut individual leaves from the outer part of the plant, leaving the inner leaves to grow.
You should cut the leaves about an inch above the soil, to avoid damaging the crown and the roots. Moreover, you should also avoid cutting too many leaves from one plant, as this will weaken the plant and reduce the yield. A good rule of thumb is to leave at least half of the leaves on each plant.
Wash and dry the leaves
You should wash the spinach leaves as soon as possible after harvesting, to remove any dirt, bugs, or pesticides. You can use a colander or a salad spinner to rinse the leaves under cold water. After this, pat them dry with a paper towel or a cloth. Additionally, you should remove any damaged or yellow leaves, and trim any tough stems.
Enjoy or store the leaves
You can eat the spinach leaves fresh, or store them in the refrigerator or freezer for later use. We'll explain how to store and freeze spinach in the next sections.
How to Harvest Spinach Seeds?
If you want to save some spinach seeds for the next season or share them with your friends and family, you must let some spinach plants bolt and produce flowers and seeds. Here are the steps to follow to harvest spinach seeds:
Select the best plants to save seeds from
It would be best if you chose healthy, vigorous, and productive plants with the desired characteristics. Some of these are the flavor, size, color, and disease resistance.
Apart from these, you should also avoid saving seeds from hybrid varieties, as they will not produce true-to-type plants. You should look for open-pollinated or heirloom varieties, which will produce plants that are similar to the parent plants.
Isolate the plants to prevent cross-pollination
Spinach is a wind-pollinated crop, which means that it can cross-pollinate with other spinach plants or related plants, such as beets, chard, or quinoa, within a distance of up to a mile. This can result in seeds that have different traits than the parent plants. To prevent cross-pollination, you should isolate the plants you want to save seeds from, by either planting them far away from other spinach plants or related plants, or covering them with a mesh bag or a cage.
Let the plants flower and set seeds
You should let the plants bolt and produce flowers, which are small and yellow, and then wait for the seeds to form and mature. The seeds are round and black, and they are enclosed in a spiny husk. The seeds are ready to harvest when they are dry and hard, and the husks are brown and brittle, usually about four to six weeks after flowering.
Harvest and clean the seeds
You should cut the seed stalks and place them in a paper bag or a bucket, and then shake or rub them to release the seeds from the husks.
Furthermore, you should then winnow the seeds, which separates the seeds from the chaff or the husks and other debris. You can do this by blowing or fanning the seeds or using a screen or a sieve. You should end up with clean and shiny seeds.
Store the seeds
It would be best if you stored the spinach seeds in a cool, dry, and dark place, such as a jar, a tin, or a plastic bag. You should also label the seeds with the variety name and the date of harvest. Besides, you can store the spinach seeds for up to five years, but they will germinate better if you use them within two to three years.
How to Store and Freeze Spinach?
Spinach is best eaten fresh, as it loses its flavor and texture quickly. However, if you have a large harvest, or you want to preserve spinach for later use, you can store or freeze it. Here are the best ways to store and freeze spinach:
Store spinach in the refrigerator
You can store fresh spinach in the refrigerator for up to a week if you keep it in a perforated plastic bag or a container with a lid. However, you should avoid washing the spinach before storing it, as this will make it wilt faster. You should wash the spinach just before using it.
Freeze spinach raw
You can freeze raw spinach without blanching it, which is a process of briefly cooking and cooling the vegetables to stop the enzyme activity that causes them to spoil. However, freezing raw spinach will result in a mushy and watery texture and a loss of flavor and nutrients. To freeze raw spinach, you should wash and dry the leaves, and then pack them in freezer bags or containers, leaving some space for expansion. You can freeze raw spinach for up to six months, and use it in smoothies, soups, or casseroles.
Freeze spinach blanched
You can freeze blanched spinach, which will retain its color, texture, flavor, and nutrients better than raw spinach. To freeze blanched spinach, you should wash and trim the leaves, and then blanch them in boiling water for one to two minutes, depending on the size of the leaves.
You should then drain and cool the leaves, and squeeze out the excess water. You can then pack the leaves in freezer bags or containers, leaving some space for expansion. Furthermore, you can freeze blanched spinach for up to a year, and use it in salads, sandwiches, or quiches.
Things to Keep in Mind: How to Grow Spinach Successfully?
Spinach is a cool-season crop that grows best in the spring and fall, when the temperatures are between 40°F and 75°F. It can tolerate light frost but not heat or drought. Spinach also prefers moist, fertile, and well-drained soil with a pH of 6.0 to 7.0. Here are some tips and tricks on how to grow spinach successfully:
Choose the right variety
There are many types of spinach, but the most common varieties are savoy, semi-savoy, and flat-leafed. Savoy spinach has dark green, crinkly leaves that are great for salads and wraps. Semi-savoy spinach has slightly curled leaves that are more resistant to diseases and bolting. Flat-leafed spinach has smooth, broad leaves that are easy to clean and process. You can also choose spinach varieties based on their maturity time, bolt resistance, flavor, and color. Bloomsdale, Tyee, Space, Melody, and Red Kitten are popular spinach varieties.
Sow the seeds
You can sow spinach seeds directly in the garden, or start them indoors and transplant them later. The best time to sow spinach seeds is in early spring, as soon as the soil can be worked, or in late summer or early fall, for a winter harvest. You can also sow spinach seeds every two to three weeks, for a continuous harvest.
Besides this, you should sow the seeds about half an inch deep, and one to two inches apart, in rows that are 12 to 18 inches apart. You should water the seeds well, and keep the soil moist until they germinate, which usually takes seven to 14 days.
Thin the seedlings
When the spinach seedlings have two to four true leaves, you should thin them to avoid overcrowding and competition. You should leave about four to six inches of space between each plant, and eat or transplant the thinned seedlings. You should also weed the area around the spinach plants regularly, to prevent pests and diseases.
Harvest the leaves
Depending on the variety, you can start harvesting spinach leaves when they are big enough to eat, usually about 25 to 50 days after sowing. You can either harvest the whole plant or pick individual leaves from the outer part of the plant, leaving the inner leaves to grow.
Additionally, you should harvest spinach in the morning, when the leaves are crisp and fresh, and before the sun gets too hot. You should also harvest spinach before it starts to bolt, which is when it produces flowers and seeds, and becomes bitter and tough.
How to Use Spinach in Different Cuisines and Recipes?
Spinach is a versatile vegetable that can be used in many different cuisines and recipes. Whether you want to make a salad, a soup, a pasta, a pie, or a smoothie, spinach can add flavor, color, and nutrition to your dish. Here are some examples of how to use spinach in different cuisines and recipes:
Mediterranean cuisine
Spinach is a staple ingredient in many Mediterranean dishes, such as spanakopita, a Greek pie made with spinach and feta cheese wrapped in phyllo dough, or spinach and chickpea stew, a Moroccan dish flavored with cumin, paprika, and lemon juice. You can also make a simple spinach salad with tomatoes, olives, and feta cheese, dressed with olive oil and vinegar.
Asian cuisine
Spinach is widely used in Asian cuisine, especially in Chinese, Japanese, and Indian dishes. You can make a Chinese spinach and tofu stir-fry with garlic, ginger, soy sauce, and sesame oil, or a Japanese spinach and sesame salad with rice vinegar, sugar, and soy sauce. You can also make an Indian spinach and potato curry with onion, garlic, ginger, turmeric, and garam masala, or a spinach and paneer cheese dish with cream, tomato, and fenugreek.
Italian cuisine
Spinach is a common ingredient in Italian cuisine, especially in pasta, pizza, and lasagna. You can make a spinach and ricotta ravioli with butter and sage sauce, or a spinach and mushroom pizza with mozzarella and parmesan cheese. You can also make a spinach and cheese lasagna with béchamel sauce, or a spinach and artichoke dip with cream cheese and sour cream.
American cuisine
Spinach is also popular in American cuisine, especially salads, sandwiches, and casseroles. You can make a spinach and strawberry salad with almonds and poppy seed dressing or a spinach and bacon sandwich with mayonnaise and mustard. You can also make a spinach and cheese casserole with eggs, milk, and breadcrumbs, or a spinach and artichoke quiche with pie crust and cheddar cheese.
Wrapping It Up!
Spinach is a wonderful vegetable that you can harvest, store, and use in various ways. It's easy to grow, harvest, and store spinach, as long as you follow some simple steps and tips. It's also healthy, delicious, and versatile, as you can use it in many different cuisines and recipes. Spinach is a green treasure that you don't want to miss.
If you want to know about how to harvest spinach, I hope that this blog has been of help to you. If there are any other queries related to the same, please feel free to let me know. All that you need to do is scroll down till you reach the bottom of the page. Then, leave your comments and suggestions in the box below. And I will be ether to answer them all for you.
Read Also:
How to Harvest Lettuce: A Step-by-Step Guide for Fresh and Crispy Salads
Everything You Need To Know About Harvesting Basil!
Asparagus 101: When, How, And How Often To Harvest?
Are you looking for the most roof care tips? Here you will learn about roof care tips including, repair, installation, and maintenance. Although your roof may be designed to protect your home for long years (say 10-15 years), you need to inspect your roof every year. It will help you remain calm and relax that you are living under a safe roof.
In this article, you will learn some valuable tips from the Minnesota roofing company. These tips ensure the safety and comfort of your home.
Roofing Tips
You can apply the following tips on your own. However, you may need expert assistance or hire a roofing agency like A to Z Construction to repair your roof.
Think About Your Safety First
Whenever you find that there is a leak on your roof, don’t rust to find it out. Being on the roof when it is raining is not the right way. It can be dangerous to walk on the roof to find a leak while raining, or there is ice buildup on your roof.
Have patience and wait until the rain stops. A temporary fix if the leak is not a solution; keep in mind that there is no quick fix for a roof leak. So, you shouldn’t meddle on the roof as soon as a leak happens. Think about your safety and take precautions before you go to spot the leak.
Wear a rubber shoe when you're going to find a leak on your roof.
Don’t work alone; take help from a buddy when you’re on the roof.
Clean Gutters and Spray the Roof
Usually, gutters are a common reason for a leak. If your gutters are not clean and clogged with leaves and debris, that can be a reason for leaks during rain. So, you should first clear the gutters.
The next step is to spray various areas of the roof to locate the leak. You can spray water on your roof with your garden hose. If it's winter, though, you shouldn't spray water. Since it's not safe to spray water on your roof when it's freezing outside, you can wait until the winter is over.
Prevent Ice Buildup
Ice buildup is a common problem in the wintertime. You cannot do anything about the ice buildup in the exterior area, such as the roof membrane, gutter, and shingles. However, you can prevent ice buildup in the interior.
For that, you should use ice and rain shields along with proper ventilation. Ice buildup in the interior causes drips inside your home. Also, you can use an edge drip to prevent this problem.
Fix Your Roof Boots
Another major problem for leakage is your roof boots. It’s common that we check the flash, skylights, roofs, and gutters for finding any possible leakages. Another thing that most people miss is the rubber roof boots.
So, you should also check the roof boots if there is any leak. If you find any defect in the roof boot, you can quickly fix it by purchasing a new one from a local store.
Inspect Your Roofing Material
Sometimes your roofing material and shingles can be of low quality or faulty, which may cause leakage soon. So, you should check the roofing material too. Always use good quality material on your roof. Since the roof is one of the most important parts of your home, you should use the standard quality material with high longevity.
Final Words
These are some of the common roofing tips to protect your home from leakage. However, you should consult a reputed roofing agency if you think that you cannot handle it on your own. Do proper research and ask for referrals before you choose a roofing agency.
More Resources:
Professional Roofing Services and Different Decorating Styles
Choosing the right roof for your home – Types to select from
Roofing Painting Contractor Leads: Ask Before Hiring One